Featured Posts
![]() John Guan - Aug 17, 2023
John Guan - Aug 17, 2023
Nowadays, a stable and reliable network is crucial for both homes and small businesses. With the increasing number of connected devices and the growing reliance on the Internet for various tasks, effective network management has become more critical than ever. Whether it’s for seamless video conferencing, smooth streaming of content, secure data transfers, or efficient IoT device management, a well-managed network is the backbone of modern living and business operations.
Part 1: What You Should Know about UniFi Network Server?
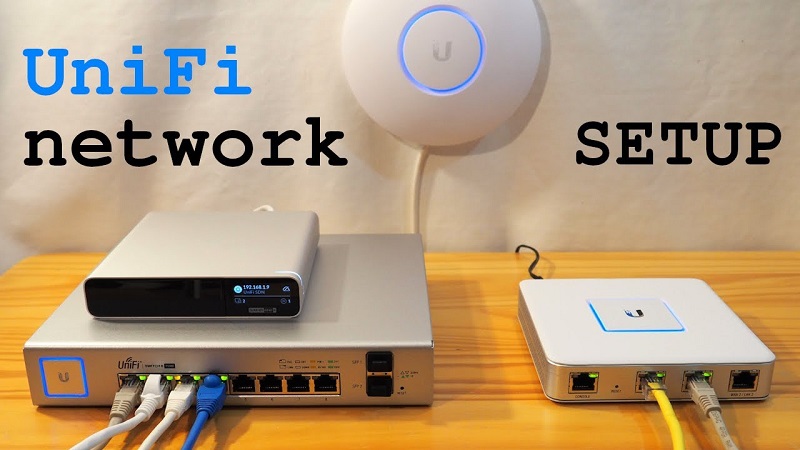
UniFi Network is a revolutionary network management solution developed by Ubiquiti Networks. It offers a comprehensive ecosystem of hardware and software designed to simplify the management of complex networks for homes and small businesses. At its core, UniFi Network provides a centralized platform that enables users to control and monitor their network infrastructure with ease.
The significance of UniFi Network lies in its ability to deliver reliable, high-performance networks without the need for extensive technical expertise. With the rapid increase in the number of connected devices, the demand for efficient network management has grown exponentially. UniFi Network addresses this need by offering a user-friendly interface that empowers DIY enthusiasts and IT professionals alike to manage their networks efficiently.
1. Key Features and Benefits of UniFi Network
Centralized Management: UniFi Network offers a single interface to manage multiple network devices, including access points, switches, routers, and security gateways. This centralized approach simplifies network configuration and monitoring, saving time and effort.
Real-time Analytics: With UniFi Network, users gain access to real-time analytics and statistics, enabling them to monitor network performance and user behavior. The intuitive dashboard provides valuable insights to optimize network resources and troubleshoot issues promptly.
Seamless Scalability: Whether it’s a small home network or a growing business infrastructure, UniFi Network is designed to scale effortlessly. Users can add new devices to the network and manage them seamlessly through the centralized Controller.
Advanced Guest Management: UniFi Network allows for easy guest network setup with customizable authentication methods, time limits, and data usage restrictions. This feature is particularly valuable for small businesses, cafes, or other public venues.
VLAN and Network Segmentation: With UniFi Network, users can create virtual LANs (VLANs) and segment their network for enhanced security and better traffic management. This feature ensures that sensitive data and critical devices remain isolated from the rest of the network.
Firmware Management: UniFi Network simplifies firmware updates for all UniFi devices, ensuring that they are up-to-date with the latest features, bug fixes, and security enhancements.
2. ZimaBoard SBC’s Compatibility with UniFi Network
ZimaBoard SBC is a powerful and versatile Single Board Computer designed to accommodate various applications, including network server hosting. When it comes to hosting a UniFi Network Server, ZimaBoard proves to be a highly compatible and efficient solution. Here are some reasons why ZimaBoard SBC is an excellent choice for running the UniFi Network Controller:

Energy-Efficient Performance: ZimaBoard’s ARM-based architecture ensures energy-efficient performance, making it ideal for 24/7 network server operation. This allows users to maintain their network infrastructure without significantly impacting their electricity bills.
Compact Form Factor: The compact size of ZimaBoard SBC enables easy placement and integration into various network setups, including small homes and office environments.
Ample RAM and Storage Options: ZimaBoard SBC is available in multiple configurations, offering different RAM and storage options to suit varying UniFi Network deployment requirements. Users can choose the configuration that best fits their needs.
Rich Connectivity Options: ZimaBoard comes equipped with multiple USB ports, Ethernet ports, and wireless connectivity options, making it well-suited to handle various network devices and peripherals.
Compatible Operating Systems: ZimaBoard SBC supports a wide range of operating systems, including Debian, Ubuntu Server, and Raspbian (for Raspberry Pi-compatible models). This flexibility ensures that users can select the most suitable OS for their UniFi Network setup.
Part 2. Preparing for UniFi Network Installation
1. Hardware Requirements for ZimaBoard SBC
Before starting the UniFi Network installation process, ensure that your ZimaBoard SBC meets the minimum hardware requirements. These requirements typically include a compatible ZimaBoard SBC model, a minimum amount of RAM (usually 2GB or higher), and sufficient storage space to accommodate the UniFi Network Controller software and associated data.
2. Downloading the UniFi Network Server Installation Package
To set up the UniFi Network Server on your ZimaBoard SBC, you need to download the UniFi Network Controller software package from Ubiquiti Networks’ official website. Make sure to choose the appropriate version for your operating system.
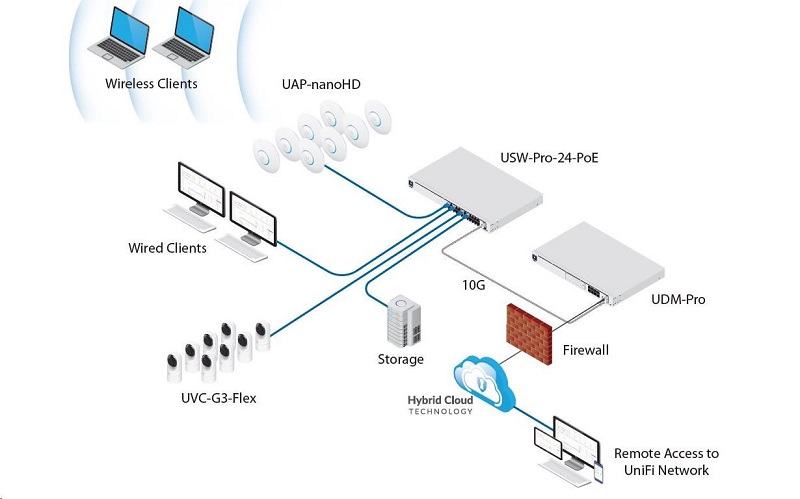
3. Ensuring Network Compatibility for UniFi Devices
Before proceeding with the installation, ensure that your network infrastructure is compatible with UniFi devices. UniFi Network supports a wide range of UniFi-branded hardware, including access points, switches, routers, and security gateways. Verify that your existing network devices are on the list of supported devices to ensure seamless integration and management through the UniFi Network Controller.
Part 3. How to Installing UniFi Network Server on ZimaBoard SBC
Before embarking on the installation of the UniFi Network Server on the ZimaBoard SBC, it is essential to ensure that the SBC is set up correctly and the operating system – CasaOS is accessible.
Connecting ZimaBoard SBC: Begin by connecting the ZimaBoard SBC to a power source using a compatible power supply. Connect a monitor to the HDMI port and a keyboard to one of the USB ports for initial configuration.
Powering on ZimaBoard SBC: Power on the ZimaBoard SBC and wait for the operating system to load. Depending on the pre-installed OS or the one you have installed, the boot time may vary.
Accessing the Command Line Interface (CLI): Once the operating system has loaded, you will be presented with the command-line interface (CLI). Here, you can enter commands to configure the system and install software.
1. Step-by-Step Installation Guide for UniFi Network Server
Update the Operating System: Before installing any software, it is crucial to ensure that the operating system is up-to-date. Use the following commands to update the system:

Install Required Dependencies: UniFi Network Server requires Java Runtime Environment (JRE) to operate. Install OpenJDK, which is a free and open-source implementation of the Java Platform:

Download UniFi Network Controller: Next, download the UniFi Network Controller software package from Ubiquiti Networks’ official website. Use the wget command to retrieve the package:

Note: Replace “6.4.54” in the URL with the latest version available at the time of installation.
Install UniFi Network Server: Once the package is downloaded, proceed with the installation using the dpkg command:

Resolve Dependencies (if needed): If the installation process reports any missing dependencies, run the following command to fix them:

2. Initial Setup and Configuration of UniFi Network
Starting the UniFi Network Controller Service: After the installation is complete, start the UniFi Network Controller service using the following command:

Accessing the UniFi Network Controller Web Interface: Once the UniFi Network Controller service is running, you can access the web interface by typing the following URL into your web browser:

Replace “your_zimaboard_ip”with the IP address of your ZimaBoard SBC. If you are accessing the web interface from the same device where the UniFi Network Server is installed, you can use “localhost”instead of the IP address.
Completing the Setup Wizard: Upon accessing the web interface, you will be prompted to go through the UniFi Network Controller’s setup wizard. Follow the on-screen instructions to create an admin account and set up the initial configuration for your network.
Adopting UniFi Devices: After the initial setup is complete, UniFi Network Controller will automatically start discovering UniFi devices on the network. To adopt these devices into the Controller, navigate to the “Devices”tab and click on “Adopt”for each device you want to manage through UniFi Network.
Configuring Network Settings: Customize your network settings through the UniFi Network Controller web interface. You can create wireless networks, set up VLANs, configure guest access, and more. The intuitive interface makes it easy to manage network settings with just a few clicks.
Backing up UniFi Network Controller: To safeguard your network configurations and settings, it is essential to regularly back up the UniFi Network Controller. In the web interface, navigate to “Settings”> “Maintenance”, and click on “Download Backup”to create a backup file.
Final Verdict:
Self-hosting an UniFi Network Server with ZimaBoard SBC opens a world of possibilities for seamless network management. UniFi Network’s comprehensive features and centralized control offer an unparalleled experience for homes and small businesses. With ZimaBoard’s energy-efficient performance and rich connectivity options, setting up the UniFi Network Server becomes a breeze.
From initial installation to configuring network settings, this DIY approach empowers users to maintain high-performance networks without the need for extensive technical expertise. By following the step-by-step guide, users can enjoy the benefits of efficient network management, real-time analytics, and scalable infrastructure, making their digital journey smoother and more secure.