Latest News
![]() John Guan - Sep 12, 2023
John Guan - Sep 12, 2023
In the world of tech and innovation, there are individuals who don’t just use products but take them to the next level. Meet Geoff ‘Sabi’ Palmer, a Cyber Security Engineer from the UK, who saw the potential in the ZimaBoard that many might have missed. In this written interview, we delve into his journey of creating the 3D-printed hacker rack for the ZimaBoard and how it has revolutionized his tech setup.
works: https://www.printables.com/model/482719-zimarack
Q1: Can you introduce yourself?
A1: Hi, I’m Geoff SabiPalmer a Cyber Security Engineer from the UK.
Q2: Could you provide an overview of the ZimaBoard and its purpose in your mind?
A2: ZimaBoard to me was always the concept and idea of having a fully-fledged Linux environment where I could run my testing, spin up and down Docker containers, and use it as a playground to learn new skills without having to spend hundreds of pounds on a server (and it used a heck of a lot less power too!).
Section 1: Inspiration and Design
Q3: What inspired you to create the 3D-printed hacker rack for the ZimaBoard?
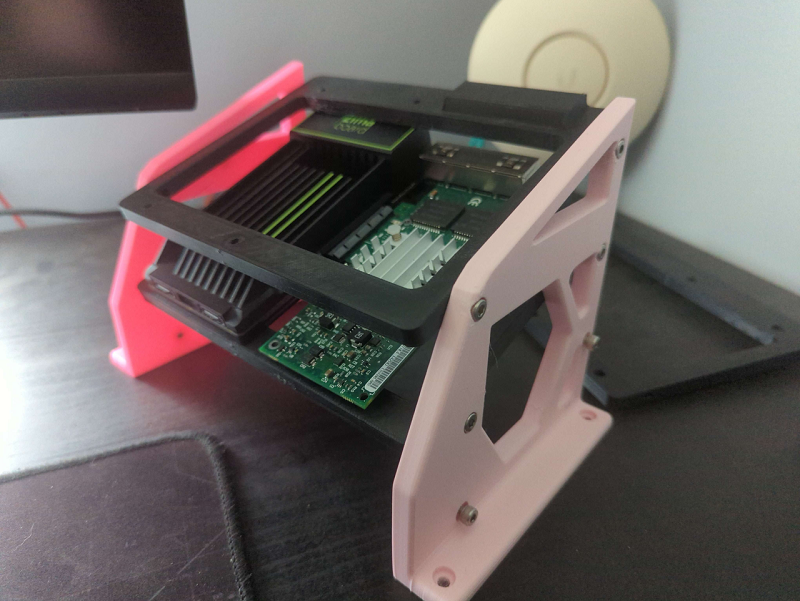
A3: I’m a bit of a neat freak at my desk and like to have things organized. The ability to stack up to 3 ZimaBoards all together and be able to move everything together when I go to the office or an event is great.
Q4: Can you walk us through your design process and the considerations you took into account while developing the rack?
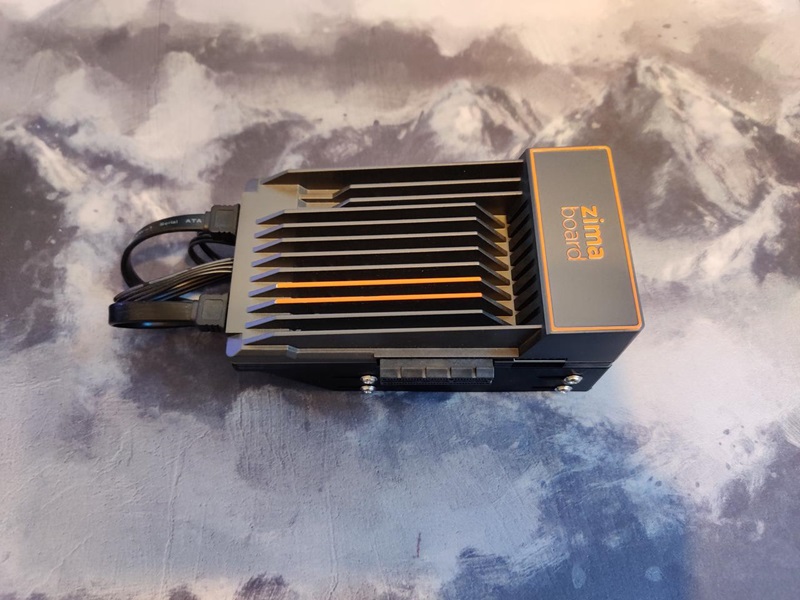
A4: I had a few things I wanted to keep in mind. I wanted something that would offer ample airflow, even though the boards don’t run hot, just to be safe. I also wanted to offer enough room for various PCIe cards, SSDs, and HDD configurations while keeping things neat and compact. I wanted to stay with the angled aesthetic of the ZimaBoard, which the design team did a great job of with the angular heatsinks.
Q5: Are there any unique or standout features of the rack design that you’d like to highlight?
A5: I think the greatest part is the access all around to the components fitted and all the power/ethernet ports are level on the rear. Oh, and of course, the PCIe card height so that it matches nicely with the port on the ZimaBoard.
Section 2: Functionality and Integration
Q6: How does the hacker rack enable the connection of multiple ZimaBoards? Could you explain the mechanism or connectors used for integration?
A6: This is a fully printed design and uses the original screws from the base of the ZimaBoard to mount it to the sleds. These are then connected to the sides with M4*10 alien head bolts. They thread into the sides of the sled, so no need for heated inserts.
Q7: Can you provide details about the specific PCIe cards you plan to incorporate into the hacker rack? Additionally, could you explain how each card’s functionality will help solve certain problems or challenges within the ZimaBoard setup?
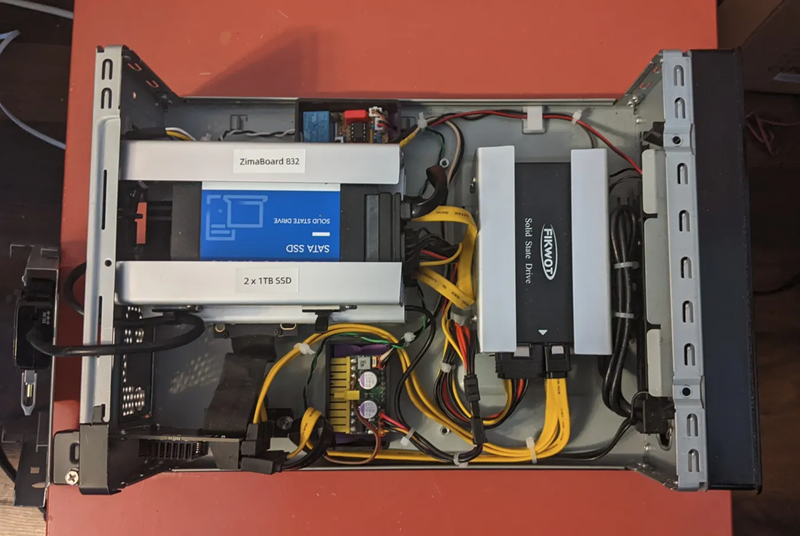
A7: At this time, I have been running a single-slot NVMe M.2 card. This is being used by TrueNAS to run my file server/shared drives. I am running a Quad GbE Intel network card (along with the onboard ports of the next ZimaBoard) for my OPNSense Router with Zenarmour Firewall. The final board in my rack is being used with CasaOS as my docker host. This way I can spin up/down as many containers as I like to tinker with and play on.
Q8: What was your thought process behind incorporating SSD or PCIe cards into the rack design? How do they fit in?
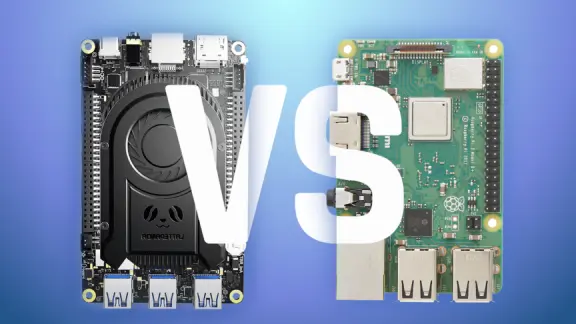
A8: While I think the ZimaBoard is a great product, it’s when you add cards/accessory drives that it really comes to life. I have been thinking about what would be the most beneficial, and I think that storage and networking ports are the key additions missing from most competitors like Raspberry Pi/RockPi.
Section 3: Benefits and Potential Applications
Q9: What are the main advantages of using the hacker rack in a ZimaBoard setup, in your opinion?
A9: I like that everything is kept neatly, organized, and accessible. Far too many times I have moved something on my desk and knocked a card out/pulled a cable out.
Q10: Could you share some specific use cases or applications where the hacker rack excels or provides added functionality?
A10: I cover events/conferences, and this has been great to pick up and go with everything configured and ready to support what I need wherever I am. I would like to look into adding shorter patch leads for the networking and perhaps a single power bar for simplicity.
Section 4: Challenges and Lessons Learned
Q11: Did you encounter any challenges during the design or implementation phase? How did you overcome them?
A11: You would not believe the number of iterations I went through to get the angle correct and make sure the heatsinks didn’t foul the next rack up or that if you move one part, the whole assembly needed moving. There were many late nights printing test models to check fitment, but I think it was just a drive to support the company and community behind this product that made me keep going.
Q12: Can you share any lessons you learned from this project or any modifications you plan to make in the future based on your experiences?
A12: I have worked on a few similar projects before, so I had some ideas that I think I could have brought into this earlier. Going forward, I would be aiming to model the product first and then import it as a model into my project. That would help with prototyping in a virtual space rather than measure a bit, then print a bit, then adjust and repeating.
Section 5: Future Development and Community Involvement
Q13: What are your future plans for the hacker rack and its integration with ZimaBoard?
A13: I think it’s pretty much done. I might look to add some options for a narrower rack with no PCIe spaces and just have it as a NAS-style storage device. I may change the rear section to support a powerbar too, as sometimes I get annoyed I have to unplug everything when I need to move it.
Q14: What type of support would you like IceWhale to provide for this project? Additionally, which ideas do you believe have potential for commercial success?
A14: I think it’s quite a niche market for this item and would be hard to push commercially. However, I think replacing the bolts with pegs and making it more of a pop-up/slot-in design could make this easier for the traveler who wants to take a homelab with them.
Q15: Lastly, what message or advice would you like to give to our readers who might be interested in exploring ZimaBoard and your hacker rack design?
A15: Firstly, be prepared to be impressed. I was a little dubious to begin with, but after running these for a few months, I’m using around 3W per board, running many docker containers, Firewalls, and file server… MediaStreaming is great across all devices and file transfers are pretty much spot on (I can saturate the gbe link)
Conclusion:
In the world of tech innovation, the 3D-printed hacker rack for the ZimaBoard is a shining example of how creative thinking and a passion for an organization can elevate your tech setup. Geoff ‘Sabi’ Palmer’s dedication and meticulous design have not only improved the functionality of the ZimaBoard but have also inspired the community to think outside the box.
As we look to the future, it’s clear that this hacker rack is just the beginning of exciting possibilities for tech enthusiasts. So, if you’re ready to enhance your ZimaBoard experience, get ready to embrace the innovation that this project represents. Your tech setup will thank you.
Sure, you can find Geoff’s designs, contact info, etc. all through the Linktree account – https://linktr.ee/geoffpalmeruk