Media Servers
![]() John Guan - May 14, 2023
John Guan - May 14, 2023
In today’s digital age, we are consuming more and more media every day. Whether it’s movies, TV shows, music, or photos, we want to be able to access our media whenever we want, from wherever we want. This is where a media server comes in.
A media server is a device that stores and manages media files, allowing you to stream them to your devices on demand. It acts as a central hub for all your media, making it easy to access and enjoy your favorite content at any time.
In this article, we will explore the benefits of having a media server at home and why the ZimaBoard Single Board Server is an excellent choice for setting up a media server.
Part 1: Benefits of having a media server at home
Convenient access to your media
One of the primary benefits of having a media server at home is that it allows you to access your media whenever you want, from any device. Whether you’re at home or on the go, you can easily stream your favorite movies, TV shows, music, or photos.
Save space and reduce clutter
By storing your media on a media server, you can free up space on your devices and reduce clutter. You don’t need to worry about running out of storage space on your phone, tablet, or laptop, as all your media is stored on the media server.
Centralized management of media
A media server allows you to centralize the management of all your media files. You can easily organize your media, create playlists, and manage your media library from a single location.
Customizable streaming options
With a media server, you have the ability to customize your streaming options. You can choose the quality of the stream, adjust the playback speed, and even add subtitles.
Part 2: Why ZimaBoard Single Board Server is a great choice for a media server?
What is ZimaBoard Single Board Server?
The ZimaBoard Single Board Server is a compact and powerful device designed specifically for setting up a media server at home. It features a powerful Intel Celeron processor, up to 8GB of RAM, and high-speed Gigabit Ethernet connectivity. It also comes pre-loaded with the ZimaBoard OS, which is a user-friendly operating system that is designed to be easy to use and navigate.
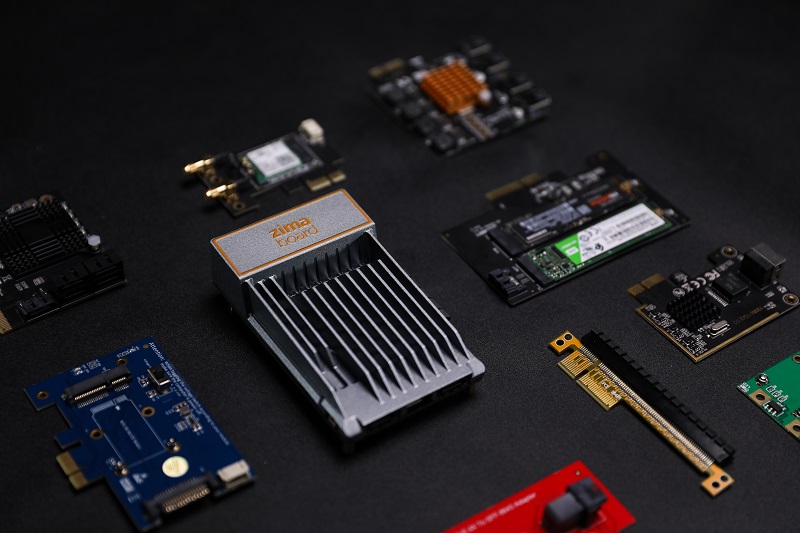
Understanding the Different Parts of the ZimaBoard Single Board Server
The ZimaBoard Single Board Server is made up of several components, each of which plays a crucial role in its performance and capabilities. These components include:
Processor: The processor is the brain of the device and is responsible for executing instructions and performing calculations.
RAM: RAM is the device’s memory and is used to temporarily store data that the processor needs to access quickly.
Storage: Storage is used to store media files and other data. The ZimaBoard Single Board Server supports 16/32 GB storage options.
Ethernet: Ethernet connectivity is used to connect the ZimaBoard Single Board Server to your network, allowing you to stream media files to your devices.
USB: The ZimaBoard Single Board Server also features USB ports, which can be used to connect additional storage devices or other peripherals.

Comparing ZimaBoard Single Board Server to Other Single Board Computers
There are several other single board computers available on the market that can be used for setting up a media server. However, the ZimaBoard Single Board Server stands out for several reasons. Firstly, it features a powerful processor and ample RAM, making it more than capable of handling the demands of a media server.
Secondly, it supports 16/32GB storage options, giving you more flexibility in terms of storage capacity and performance. Finally, it comes pre-loaded with the Casaos, which is a user-friendly operating system that is designed specifically for media server applications.
Why ZimaBoard is a Good solutions for Media Server Setup?
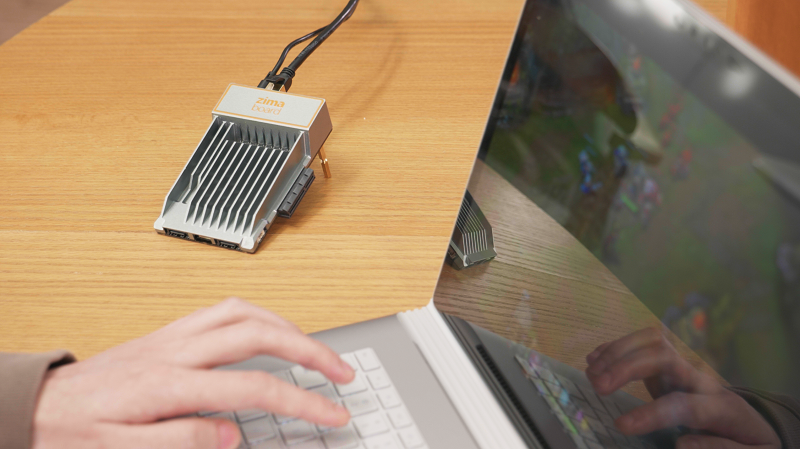
Small and compact
TheZimaBoard Single Board Serveris a small and compact device, making it easy to set up and install in any home. It takes up minimal space and can be easily hidden away if needed.
Low power consumption
The ZimaBoard Single Board Server is designed to be energy-efficient, consuming only a fraction of the power of a traditional media server. This makes it an excellent choice for anyone looking to reduce their energy consumption and save money on their electricity bill.
High-performance hardware
Despite its small size, the ZimaBoard Single Board Server is packed with high-performance hardware. It features a powerful ARM Cortex-A72 quad-core processor, up to 4GB of RAM, and high-speed Gigabit Ethernet connectivity.
Easy to use
Setting up a media server with the ZimaBoard Single Board Server is incredibly easy. It comes pre-loaded with the ZimaBoard OS, which is a user-friendly operating system that is designed to be easy to use and navigate.
Affordable
The ZimaBoard Single Board Server is an affordable option for anyone looking to set up a media server at home. It’s priced competitively compared to other media servers on the market, making it an excellent choice for those on a budget.
Part 3: How to Choosing the Right Hardware for Media Server Setup
When it comes to setting up a media server at home, choosing the right hardware is crucial. The hardware you choose will determine the performance and capabilities of your media server. In this section, we will explore the hardware options available for a media server and why the ZimaBoard Single Board Server is an excellent choice.
Recommended Hardware Configuration for a Media Server
When it comes to setting up a media server, there are several hardware configurations that you can choose from. The configuration you choose will depend on your specific needs and budget. However, here is a recommended hardware configuration for a media server using the ZimaBoard Single Board Server:
- ZimaBoard Single Board Server with a Intel Celeron processor and 8GB of RAM
- 32GB M.2 SSD storage
- Gigabit Ethernet connectivity
- USB 3.0 ports for connecting additional storage devices
This configuration provides ample processing power and storage capacity for a media server and should be more than sufficient for most home users.
Part 4: Setting Up ZimaBoard Single Board Server
Once you have chosen the right hardware for your media server and obtained the ZimaBoard Single Board Server, it’s time to set it up. In this section, we will go through the steps you need to follow to get your media server up and running.
- Installing the Operating System
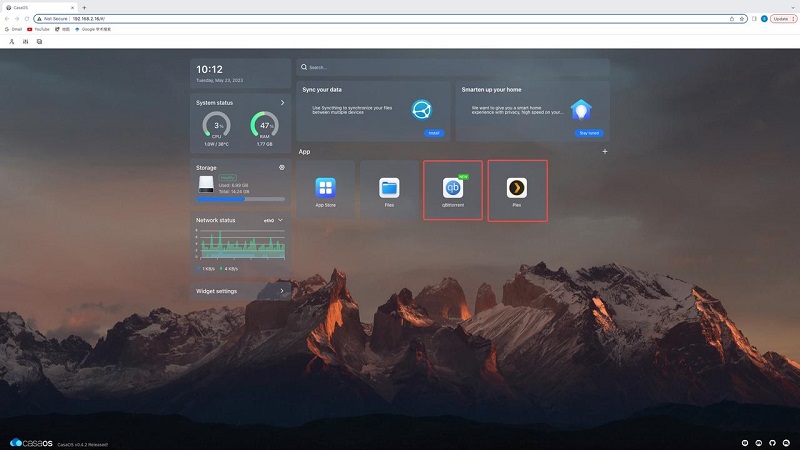
The first step is to install the operating system. The ZimaBoard Single Board Server comes pre-loaded with the ZimaBoard Personal Cloud – Casaos, which is a user-friendly operating system designed for media server applications. However, if you want to use a different operating system, you can do so by following the instructions provided by the manufacturer.
To install the Zima Casaos, follow these steps:
- Download the ZimaBoard OS image from the ZimaBoard website.
- Insert a microSD card into your computer and format it using the SD Card Formatter tool.
- Open the Etcher tool and select the ZimaBoard OS image and the microSD card.
- Click the ‘Flash!’ button to write the image to the microSD card.
- Insert the microSD card into the ZimaBoard Single Board Server and power it on.
The ZimaBoard OS should now boot up on your media server.
- Setting up the Network Connection
Next, you need to set up the network connection. The ZimaBoard Single Board Server supports Gigabit Ethernet connectivity, which provides fast and reliable network access. To set up the network connection, follow these steps:
- Connect the ZimaBoard Single Board Server to your router or switch using an Ethernet cable.
- Power on the ZimaBoard Single Board Server.
- Navigate to the network settings in the ZimaBoard OS and configure the IP address, subnet mask, and default gateway settings according to your network setup.
- Once you have configured the network settings, you should be able to access your media server from other devices on your network.
- Configuring the Firewall
To ensure the security of your media server and your home network, it’s essential to configure the firewall. The ZimaBoard comes pre-configured with a firewall, but you can customize it to meet your specific needs.

To configure the firewall, follow these steps:
- Navigate to the firewall settings in the ZimaBoard OS.
- Configure the inbound and outbound rules according to your specific needs.
- Save the firewall configuration and restart the firewall service.
- Configuring the firewall will help protect your media server from unauthorized access and keep your home network secure.
- Installing and Configuring a Remote Desktop Connection
Finally, you can install and configure a remote desktop connection to remotely access your media server. This is useful if you want to manage your media server from another device on your network or even from outside your home network.
To install and configure a remote desktop connection, follow these steps:
- Install a remote desktop software such as VNC or TeamViewer on your media server.
- Configure the remote desktop settings according to your specific needs.
- Save the settings and start the remote desktop service.
- Once you have set up the remote desktop connection, you can remotely access your media server from another device on your network or even from outside your home network.
Part 5: Setting Up a Media Server on ZimaBoard Single Board Server
After completing the previous steps, you are now ready to set up your media server on the ZimaBoard Single Board Server. This step is crucial because it will determine the types of media you can access from your devices. Here are the steps to follow:
- Installing Media Server Software
There are many media server software options available, and you can choose the one that suits your needs. Some popular options include Plex, Emby, and Jellyfin. In this article, we will use Plex as an example. Follow these steps to install Plex on your ZimaBoard Single Board Server:
- Download the Plex Media Server package from the official website (https://www.plex.tv/media-server-downloads/).
- Extract the downloaded package.
- Open the Terminal application on your ZimaBoard Single Board Server.
- Navigate to the extracted package directory.
- Run the following command to install Plex: sudo dpkg -i plexmediaserver_*.deb
- Configuring Media Server Settings
Once you have installed Plex, you need to configure its settings to access your media files. Here is how you can do it:
- Open a web browser on your computer or mobile device.
- Type your ZimaBoard Single Board Server’s IP address followed by “:32400/web” in the address bar. For example, “http://192.168.1.100:32400/web”.
- Follow the on-screen instructions to create a Plex account if you do not already have one.
- Click “Add Library” to add media files to your media server.
- Select the type of media you want to add (movies, TV shows, music, etc.).
- Browse to the directory where your media files are located and click “Add”.
- Repeat these steps for each media type you want to add.
- Adding Media to the Server
Once you have configured the media server settings, you can start adding media to the server. Here are the steps to follow:
- Copy your media files to the appropriate directories on your ZimaBoard Single Board Server.
- Open the Plex web app and navigate to the library you want to add the media to.
- Click the “Update Library” button to scan for new media files.
- Once the scan is complete, your media files should appear in the library.
- Testing the Media Server
Now that you have set up your media server, it’s time to test it out. Here is how you can do it:
- Open the Plex app on your device.
- Sign in to your Plex account.
- Navigate to the media library you want to access.
- Select the media file you want to play.
- The media should start playing on your device.
Part 6: Accessing the Media Server
Now that you have set up your media server on the ZimaBoard Single Board Server, it’s time to learn how to access it from your devices.
- Setting up User Accounts
To access your media server, you’ll need to set up user accounts for everyone who will be using it. This will allow you to control access to the server and ensure that only authorized users are able to access the media stored on it.
To create user accounts, log in to the ZimaBoard Single Board Server using the admin account. Once logged in, navigate to the user accounts settings and create a new account for each user. Be sure to set permissions for each account to control what they can and cannot access on the media server.
2. Connecting to the Media Server from Devices
Once you have set up user accounts, you can connect to the media server from your devices. To do this, you’ll need to make sure that your devices are on the same network as the ZimaBoard Single Board Server. You can do this by connecting your devices to the same Wi-Fi network as the server.
Once your devices are on the same network, you can access the media server by typing its IP address into a web browser on your device. This will bring up the media server’s web interface, where you can browse and stream your media.
3. Streaming Media from the Media Server
To stream media from the media server, simply navigate to the media you want to watch or listen to and click on it. This will start the media streaming in your web browser or media player app on your device.
If you want to stream media to a TV or other media device, you can do this by using a media streaming device like Chromecast or Roku. Simply connect the streaming device to your TV and connect it to the same network as the media server. Then, use the device to access and stream your media from the media server.
4. Remote Access to the Media Server
If you want to access your media server from outside your home network, you can set up remote access. To do this, you’ll need to configure your router to allow incoming connections to the ZimaBoard Single Board Server.
Once you have set up remote access, you can access your media server from anywhere by typing its IP address into a web browser on any device. This will allow you to stream your media from the server even when you’re away from home.
Part 7. Tips for Maintaining Your Media Server
Setting up a media server is an exciting project, but it’s important to remember that maintaining it is just as crucial. Here are some tips for keeping your media server in top condition:
Backing up Your Media Server
Backing up your media server is essential to ensure that you don’t lose any of your media files. A good backup strategy involves creating a backup schedule that automatically backs up your media server on a regular basis.
You can use backup software like Acronis True Image or Macrium Reflect to create full or incremental backups of your media server. Storing your backups on an external hard drive or in the cloud is a wise decision as it can save you from data loss in case your server crashes.
Updating the Media Server Software
Keeping your media server software up-to-date is vital as it ensures that your server runs smoothly and securely. Most media server software has an automatic update feature, but you can also manually check for updates and install them if necessary. Make sure you read the release notes to see what changes have been made to the software and whether there are any known issues.
Monitoring the Health of the Server
Monitoring the health of your media server helps you identify issues before they become bigger problems. There are various monitoring tools available that can help you keep track of your server’s health, such as Nagios or Zabbix. These tools can help you keep an eye on important metrics like CPU usage, RAM usage, and storage capacity. You can also set up alerts to notify you when certain thresholds are met, so you can take action before any damage is done.
Troubleshooting Common Issues
Despite your best efforts, issues can still arise with your media server. Knowing how to troubleshoot common problems can help you get your server up and running quickly. For example, if you’re having trouble accessing your media server from a device, check your firewall settings and make sure the port for your media server is open. If you’re having trouble streaming media, check your network connection and make sure your media server is powerful enough to handle the file format.
Conclusion
In this article, we have discussed the process of setting up a media server for home with ZimaBoard Single Board Server. We have explored the benefits of having a media server at home and why ZimaBoard Single Board Server is a great choice for a media server.
We have also discussed the importance of choosing the right hardware, setting up the ZimaBoard Single Board Server, installing and configuring the media server software, and accessing the media server from various devices.