Media Servers
![]() John Guan - May 27, 2023
John Guan - May 27, 2023
In today’s digital age, home entertainment has taken center stage, transforming the way we enjoy movies, TV shows, and music. With the abundance of media content available, organizing and accessing our favorite content can be a challenge.
This is where the Plex media server comes into play, providing a seamless and comprehensive solution for managing and streaming media across various devices. Combined with the powerful hardware capabilities of ZimaBoard, Plex Media Server offers a truly immersive and personalized home entertainment experience.

Part 1: What You Should Know about Plex Media Server?
In the world of home entertainment, managing and accessing media content seamlessly across multiple devices has become increasingly important. Plex Media Server has emerged as a powerful solution to this challenge, offering a comprehensive platform that simplifies media organization and streaming. When combined with the capabilities of ZimaBoard, Plex takes home entertainment to a whole new level, unlocking a world of possibilities.
1. What is Plex Media Server?
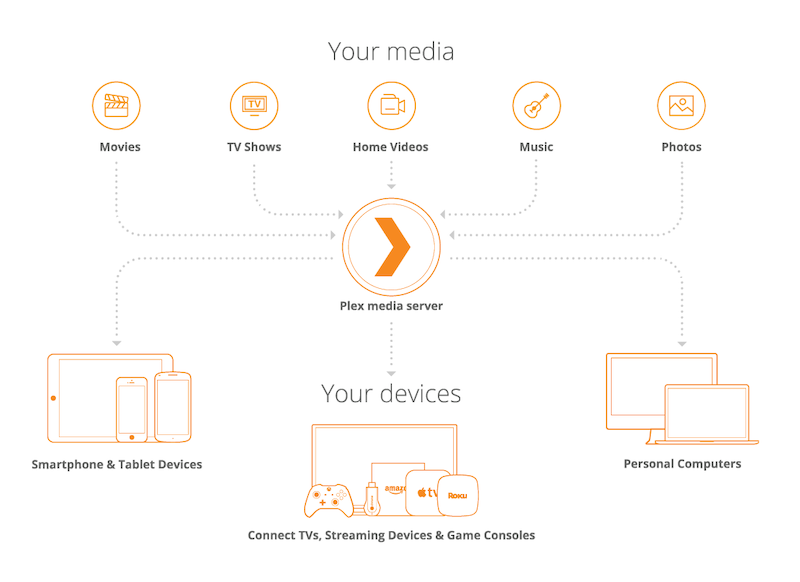
At its core, the Plex media server is a digital hub that allows users to manage and stream their media content across various devices. It acts as a central repository for your movies, TV shows, music, photos, and more, ensuring that your media library is easily accessible whenever and wherever you want it. Plex provides a user-friendly interface that organizes and presents your content in an intuitive manner, making it a breeze to navigate through your vast collection.
2. Plex Media Server Features and Benefits
Streamlining Media Organization: One of the key features of Plex is its ability to automatically fetch metadata, cover art, and other relevant information for your media files. This results in a visually appealing and organized library, making it easy to find and enjoy your favorite content. Plex also allows you to create custom playlists, manage subtitles, and apply filters, giving you full control over your media experience.
Cross-Platform Compatibility: Plex supports a wide range of devices and operating systems, including Windows, macOS, Linux, iOS, Android, smart TVs, streaming devices, and gaming consoles. This versatility ensures that you can access your media library on virtually any device, whether you’re at home or on the go.
Remote Access: One of the standout features of Plex is its ability to provide remote access to your media library. With a secure Plex account, you can stream your content over the internet, allowing you to enjoy your movies and TV shows even when you’re away from home. This feature is especially useful for frequent travelers or individuals who want to access their media on the move.
Media Casting: Plex supports media casting to compatible devices, such as Chromecast, Roku, Apple TV, and Fire TV. This means that you can easily stream your content from your mobile device or computer to your big-screen TV, creating a cinematic experience right in your living room.
3. How Plex Media Server Works
Media Storage: To set up Plex, you need a computer or NAS (Network-Attached Storage) device to act as your media server. This is where you store your media files, ensuring that they are accessible to Plex. ZimaBoard, with its powerful hardware capabilities, serves as an ideal platform for hosting your Plex media server, providing smooth and efficient performance.
Server Configuration: Once you have your media server set up, you install the Plex Media Server software and configure it according to your preferences. Plex offers a user-friendly web interface that guides you through the setup process, allowing you to specify the location of your media files and customize various settings.
Media Indexing and Metadata: After configuring Plex, it automatically scans your media files, extracting relevant information such as titles, descriptions, cast, and artwork. This process, known as media indexing, is crucial for creating a visually appealing and searchable media library. Plex relies on various online databases to fetch accurate and up-to-date metadata for your content.
Device Connection and Streaming: Once your media library is organized and indexed, you can connect your devices to Plex and start streaming your content. Plex provides dedicated apps for different platforms, allowing you to access your media library on smartphones, tablets, smart TVs, and other compatible devices. With ZimaBoard’s powerful hardware, you can enjoy smooth and uninterrupted streaming, even for high-definition content.
Part 2: What You Should Know about ZimaBoard Media Server
As technology continues to advance, home entertainment has become an integral part of our lives. Whether it’s streaming movies, binge-watching TV shows, or listening to our favorite music, we want a seamless and immersive experience.
ZimaBoard, coupled with Plex Media Server, offers a powerful combination that unlocks the full potential of home entertainment. In this article, we will explore ZimaBoard, its impressive hardware specifications, and how to set it up to maximize the capabilities of the Plex media server.

1. What is ZimaBoard Media Server?
ZimaBoard is a versatile and powerful hardware solution designed to enhance the performance of media servers like Plex. It provides the perfect foundation for building a robust and efficient media streaming system. With its compact form factor and exceptional capabilities, ZimaBoard offers a seamless and immersive home entertainment experience.
2. ZimaBoard Hardware Specifications and Capabilities
Processor and Graphics: ZimaBoard is equipped with an Intel Celeron processor, capable of handling the demands of media transcoding and streaming. Whether it’s decoding high-resolution videos or processing multiple streams simultaneously, ZimaBoard delivers exceptional performance. Its integrated graphics capabilities ensure smooth playback of high-definition content.
Memory and Storage: ZimaBoard offers ample memory capacity to handle the requirements of media servers and streaming applications. With sufficient 8GB RAM, you can ensure smooth multitasking and efficient processing of media files. In terms of storage, ZimaBoard provides various options, including 32GB onboard storage and expandable storage through external drives or network-attached storage (NAS) solutions.
Connectivity: ZimaBoard offers a range of connectivity options to ensure seamless integration with your home network. It supports Gigabit Ethernet for high-speed wired connections, ensuring stable and fast data transfer rates.
Power Efficiency: ZimaBoard is designed with power efficiency in mind, utilizing low-power components without compromising on performance. This ensures that your home entertainment system operates efficiently while minimizing energy consumption.

3. How to Setting up ZimaBoard for Plex Media Server?
Hardware Requirements: Before setting up ZimaBoard for Plex, it’s important to ensure that you have the necessary components. These include a ZimaBoard device, power adapter, HDMI cable for connecting to a display, and optionally, external storage devices or NAS solutions for expanding the storage capacity.
Operating System Installation: ZimaBoard supports various operating systems, including Linux-based distributions optimized for media server applications. You can choose a suitable operating system for your needs and follow the installation instructions provided by ZimaBoard. This will set up the foundation for running Plex Media Server smoothly.
Plex Media Server Installation: Once the operating system is installed, the next step is to set up Plex Media Server on ZimaBoard. Plex provides a straightforward installation process, which involves downloading the Plex Media Server software and following the prompts to complete the installation. Detailed instructions are available on the Plex website.
Plex Configuration: After the installation, you can access the Plex Media Server interface through a web browser. Here, you will configure Plex, including specifying the location of your media files and setting up user accounts and preferences. Plex offers a user-friendly interface that guides you through the configuration process, making it easy to customize your media server.
Media Library Organization: With Plex Media Server set up on ZimaBoard, you can start organizing your media library. Plex automatically scans your media files, retrieves metadata, and organizes them into a visually appealing and easy-to-navigate interface. You can create separate libraries for movies, TV shows, music, photos, and more, allowing for seamless content browsing and playback.
Part 3: Guide to Installing and Configuring Plex Media Server on ZimaBoard
When it comes to home entertainment, Plex Media Server is a game-changer, offering a seamless way to organize and stream media content across various devices. When combined with the power and capabilities of ZimaBoard, the home entertainment experience reaches new heights.
1. Downloading and Installing Plex Media Server
The first step in unleashing the power of Plex on your ZimaBoard is to download and install the Plex Media Server software. Follow these steps to get started:
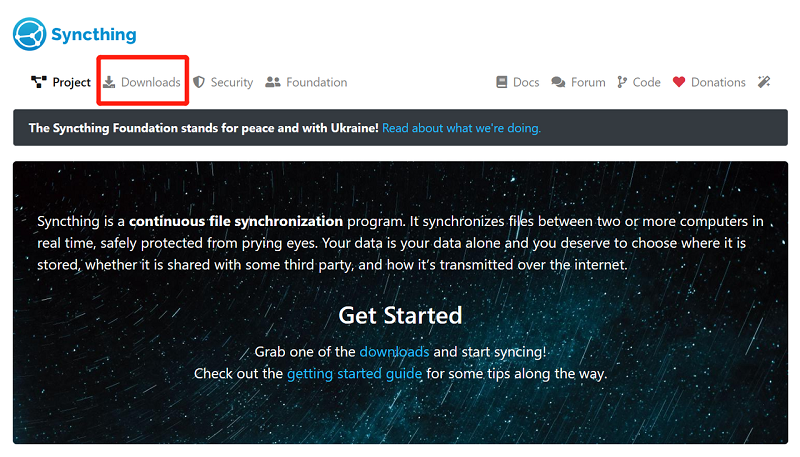
- Visit the official Plex website and navigate to the Downloads section.
- Select the appropriate version of Plex Media Server for your ZimaBoard operating system.
- Once the download is complete, locate the installer file and run it.
- Follow the on-screen prompts to install Plex Media Server on your ZimaBoard.
2. Configuring Plex Media Server for Optimal Performance
After successfully installing Plex Media Server, it’s time to configure it to ensure optimal performance on your ZimaBoard. Consider the following steps:
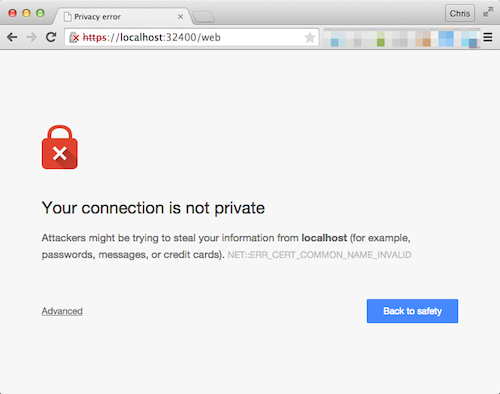
Launch Plex Media Server by accessing the Plex web interface through your preferred web browser. The default address is usually “http://localhost:32400/web.”
Create a Plex account or sign in if you already have one. This account will allow you to access your media library remotely and sync content across devices.
On the initial setup screen, choose a name for your Plex Media Server. This name will be used to identify your server on your local network and when accessing it remotely.
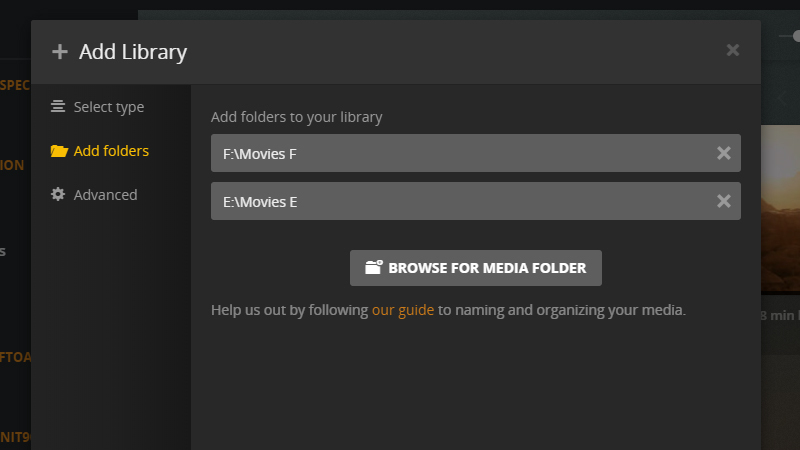
Add your media libraries to Plex by selecting the type of content you want to include (movies, TV shows, music, etc.). Specify the folders where your media files are located and customize the library settings as desired.
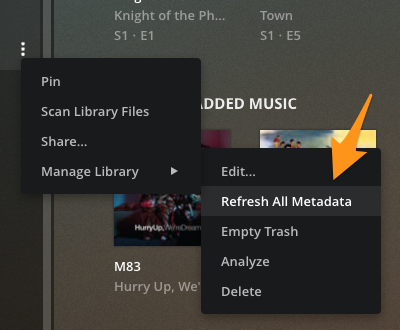
Enable Plex Media Server’s automatic library updates. This feature ensures that Plex detects new media files and updates metadata and artwork accordingly.
Configure Plex’s media analysis settings. This includes options like automatically generating chapter markers for movies, analyzing music files for improved metadata, and more. Adjust these settings according to your preferences.
3. Customizing Plex Media Server Settings on ZimaBoard
Plex Media Server provides a range of customization options to enhance your home entertainment experience on your ZimaBoard. Consider the following settings:
Transcoding Settings: Transcoding is the process of converting media files to a compatible format for streaming. Access the Plex web interface and navigate to Settings> Transcoderto configure transcoding options. Adjust settings such as the quality, speed, and format of transcoded files based on your ZimaBoard’s hardware capabilities and network conditions.
Remote Access: To enable remote access to your Plex Media Server, go to Settings> Remote Access. Ensure that the Enable Remote Accessoption is checked, and Plex will handle the necessary configuration. This allows you to access your media library from anywhere using the Plex app or web interface.
User Access and Sharing: Plex Media Server allows you to create user accounts with varying levels of access. You can invite family members or friends to access your media library and customize their permissions. Explore the Userssection in the Plex web interface to manage user access and sharing settings.
Plex Apps and Add-Ons: Plex offers a variety of apps and add-ons to enhance your media streaming experience. Access the App Storesection within the Plex web interface to explore and install additional features, such as subtitle management, content discovery, and integration with external services.
Part 4: How to Organize and Manage Media on Plex?
Plex Media Server, when combined with ZimaBoard, provides a powerful platform for organizing and managing your media libraries. In this section, we will explore the key steps to import, organize, and manage your media content effectively within Plex.
1. Importing Media Libraries to Plex Media Server
To begin your media organization journey on Plex, follow these steps to import your media libraries:
- Launch the Plex web interface and access your Plex Media Server dashboard.
- Click on the Librariesoption, then select Add Library.
- Choose the type of media you want to import, such as movies, TV shows, music, or photos.
- Specify the location of your media files on your ZimaBoard or network-attached storage (NAS) device.
- Customize the library settings, including the name, language, and agent preferences for metadata retrieval.
2. Organizing Media Content for Easy Navigation
Once your media libraries are imported, it’s crucial to organize them for seamless navigation. Consider the following strategies:
Create Folders and Collections: Group similar types of media into separate folders or collections. For example, you can create folders for different genres of movies or collections for specific TV show franchises. This helps in organizing your content and makes it easier to find and browse.
Use Naming Conventions: Adopt a consistent naming convention for your media files to ensure uniformity and easier sorting. Include relevant information such as the title, year, and quality in the file names. Plex can then use this information to automatically retrieve accurate metadata for your files.
Customize Metadata and Artwork: Plex automatically fetches metadata and artwork for your media, but you can also manually edit and customize them. This includes adding additional details, correcting information, or choosing preferred artwork. By enhancing the metadata, you can improve the overall viewing experience.
Create Playlists: Utilize Plex’s playlist feature to curate customized lists of your favorite media. You can create playlists based on themes, moods, or even specific occasions. This allows for personalized and continuous playback of content that matches your preferences.
3. Managing Metadata and Artwork in Plex Media Server
Plex provides various tools and options for managing metadata and artwork, giving you greater control over how your media is presented. Consider the following techniques:
Edit Metadata: If Plex doesn’t retrieve accurate metadata for your media, you can manually edit it. Simply select the media file, click on the Editbutton, and modify the relevant fields. This ensures that your media is properly identified and described within Plex.
Match Metadata: In cases where Plex doesn’t automatically match your media with the correct metadata, you can initiate a manual matching process. This involves searching for the correct metadata using the provided search function and selecting the appropriate result.
Choose Preferred Artwork: Plex allows you to select the preferred artwork for your media. If you’re not satisfied with the automatically retrieved artwork, you can manually choose from alternative options or upload custom artwork for a more personalized touch.
Regularly Update Libraries: As you acquire new media or make changes to your existing collection, it’s important to update your libraries within Plex. This ensures that Plex remains aware of any additions, removals, or modifications to your media, keeping your library information up to date.
By following these steps and effectively managing your media within Plex, you can create an organized and visually appealing library that enhances your home entertainment experience. Take advantage of the customization options available in Plex to tailor your media presentation to your preferences and enjoy a seamless and engaging viewing experience on your ZimaBoard-powered home entertainment system.
Part 5: Streaming and Transcoding with Plex on ZimaBoard Media Server
1. What are Streaming and Transcoding in Plex?
Streaming is the process of delivering media content from your Plex Media Server to your devices over a network connection. Plex intelligently adapts the media quality to match your device’s capabilities and network conditions. Transcoding, on the other hand, refers to the conversion of media files to a compatible format for seamless playback on the target device. Plex performs transcoding when necessary to ensure smooth streaming.
2. Optimizing Streaming Settings for Different Devices
To optimize your streaming experience with Plex on ZimaBoard, consider the following settings:
Quality Settings: Access the Plex web interface and navigate to Settings> Web> Qualityto adjust the streaming quality. Balance the quality and bandwidth to match the capabilities of your devices and network.
Direct Play and Direct Stream: Enable the Direct Playand Direct Streamoptions in the Plex settings to allow compatible devices to play media without transcoding. This reduces the load on your ZimaBoard’s CPU, resulting in better performance.
Transcoding Settings: If transcoding is necessary, configure the transcoding settings to optimize performance. Consider factors such as the quality, speed, and format of transcoded files. Experiment with these settings to find the ideal balance for your ZimaBoard’s hardware capabilities and network conditions.
3. Leveraging ZimaBoard’s Hardware Capabilities for Transcoding
ZimaBoard offers powerful hardware capabilities that can enhance the transcoding performance of Plex. Consider the following techniques:
GPU Acceleration: If your ZimaBoard is equipped with a compatible graphics processing unit (GPU), enable hardware-accelerated transcoding. This offloads the transcoding tasks to the GPU, resulting in faster and more efficient performance.
CPU Optimization: Ensure that your ZimaBoard’s CPU is operating at optimal settings. Consider adjusting power management settings in the BIOS to prioritize performance over energy efficiency. This can help maximize transcoding capabilities.
RAM Allocation: Allocate sufficient memory (RAM) to Plex Media Server on your ZimaBoard. Plex requires a certain amount of memory for efficient transcoding operations. Allocate an appropriate amount based on the size of your media library and the number of concurrent streams you expect.
Part 6: How to Accessing Plex Media Server Remotely
1. Setting up Remote Access to Plex Media Server
To access your Plex Media Server remotely, follow these steps:
- Log in to your Plex account on the Plex web interface.
- Navigate to Settings>Remote Access.
- Enable remote access by checking the Enable Remote Accessoption.
- Plex will attempt to automatically configure remote access. If successful, you will see a confirmation message.

2. Configuring Secure Connections for Remote Access
To ensure secure remote access to your Plex Media Server, consider the following steps:
Enable Secure Connections: In the Plex settings, navigate to Settings>Network> Secure Connections. Choose the appropriate secure connection option, such as Preferredor Required.
SSL Certificate: Obtain and install an SSL certificate to encrypt the remote access connection. This adds an extra layer of security when accessing your Plex Media Server remotely.
3. Troubleshooting Common Remote Access Issues
If you encounter issues with remote access, consider the following troubleshooting steps:
Port Forwarding: Ensure that the necessary ports (typically 32400) are correctly forwarded on your router to allow remote access.
Firewall Settings: Check your firewall settings to ensure that Plex Media Server has the necessary permissions to communicate through the firewall.
Internet Service Provider (ISP) Restrictions: Some ISPs impose restrictions on remote access. Check with your ISP to determine if any limitations are in place and if they can be lifted.
Part 7: Enhancing the Plex Experience on ZimaBoard SBC
1. Exploring Plex Plugins and Integrations
Plex plugins and integrations extend the functionality of your Plex Media Server and provide additional features. Consider the following:
Plex Web Tools: Install Plex Web Tools, a suite of plugins that enhance the Plex web interface with additional capabilities. These plugins allow you to manage subtitles, create playlists, access advanced metadata editing, and much more.
Trakt Scrobbler: Integrate Trakt Scrobbler to sync your Plex media playback history with your Trakt.tv account. This enables you to keep track of your watched content and receive personalized recommendations.
Tautulli: Install Tautulli, a powerful analytics and monitoring tool for Plex. Tautulli provides detailed insights into your media consumption habits, allowing you to track watched media, analyze trends, and receive notifications for new content releases.
2. Installing and Using Plex Apps on Different Devices
Plex offers dedicated apps for various devices, allowing you to access your media library conveniently. Follow these steps:
Device Installation: Install the Plex app on your preferred devices, such as smartphones, tablets, smart TVs, or streaming devices like Roku or Apple TV. These apps are available through the respective app stores.
Account Linking: Once the app is installed, log in with your Plex account credentials. This links the app to your Plex Media Server, providing access to your media library and personalized settings.
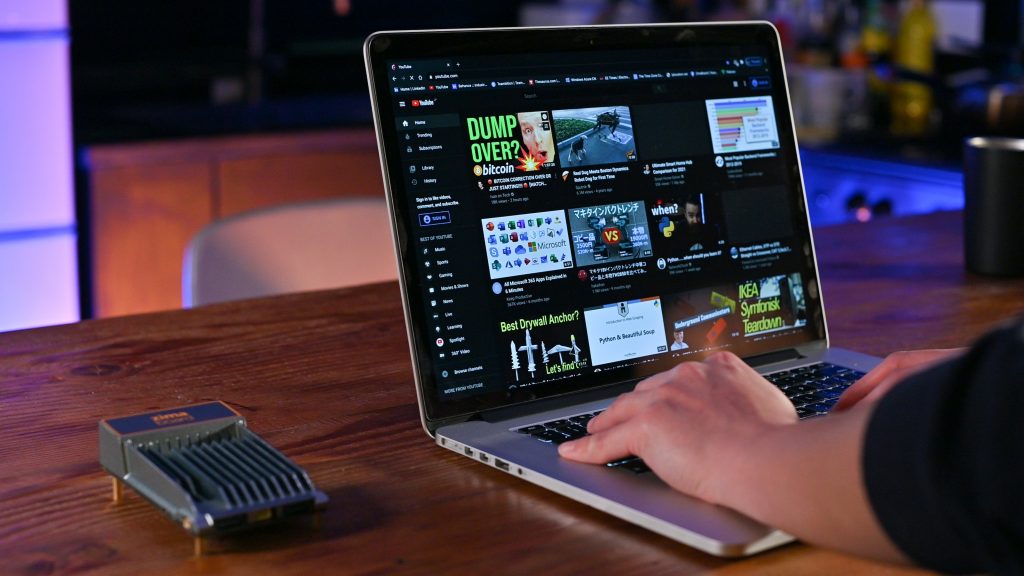
Streaming on the Go: With Plex apps, you can stream your media library remotely over the internet. Simply open the app, select your Plex Media Server, and start enjoying your favorite movies, TV shows, music, and photos anywhere.
3. Integrating ZimaBoard with Home Automation for a Seamless Experience
ZimaBoard can be seamlessly integrated with home automation systems to enhance the Plex experience. Consider the following:
Voice Control: Connect ZimaBoard to voice assistant devices like Amazon Echo or Google Home. This allows you to control Plex playback, search for media, and manage your library using voice commands.
Lighting and Ambience: Use ZimaBoard’s integration with smart lighting systems to create immersive viewing experiences. Sync your lights with the media being played on Plex to enhance the atmosphere and immerse yourself in the content.
Automation Routines: Utilize home automation platforms like SmartThings or Home Assistant to create automation routines. For example, you can trigger specific actions when you start watching a movie, such as dimming the lights, closing the curtains, and adjusting the temperature for optimal comfort.
Part 8: Plex Media Server Security and Privacy
1. What are the Security Risks and Vulnerabilities?
When using Plex Media Server on ZimaBoard, it’s crucial to be aware of potential security risks and vulnerabilities. Understand the following:
Network Security: Ensure your ZimaBoard and network are protected with strong passwords and secure Wi-Fi encryption protocols. Regularly update your router’s firmware and enable firewall features to minimize the risk of unauthorized access.
Software Updates: Keep Plex Media Server and ZimaBoard’s operating system up to date with the latest security patches. Regularly check for updates and enable automatic updates whenever possible.
2. Implementing Best Practices for Securing Plex Media Server
To secure your Plex Media Server, follow these best practices:
User Authentication: Enable strong user authentication by setting up secure passwords for Plex user accounts. Avoid using default or easily guessable passwords.
Remote Access Security: If you have enabled remote access, ensure it is properly secured with SSL encryption. Use a trusted SSL certificate to protect data transmission between your Plex Media Server and remote devices.
Two-Factor Authentication: Enable two-factor authentication for your Plex account. This adds an extra layer of security by requiring a verification code in addition to your password for accessing your account.
3. Protecting User Privacy and Data on ZimaBoard SBC
To protect user privacy and data on ZimaBoard, consider the following measures:
Data Collection: Review the data collection practices of Plex Media Server and adjust the settings to align with your privacy preferences. Plex offers granular control over data collection, allowing you to customize what information is shared.
Secure Remote Access: Ensure that your remote access to Plex is configured with secure connections and proper encryption. This safeguards your data during transmission and protects it from potential eavesdropping or interception.
User Permissions: Manage user permissions within Plex to control access to your media library. Assign appropriate roles and permissions to ensure that only authorized users can view and manage your content.
Final Verdict:
With Plex Media Server – ZimaBoard, you have the power to unleash the full potential of your home entertainment system. So, go ahead, set up your own media server, organize your media library, and enjoy a personalized and immersive entertainment experience like never before. Let Plex Media Server and ZimaBoard redefine the way you enjoy movies, TV shows, music, and photos in the comfort of your home.