Media Servers
![]() John Guan - May 14, 2023
John Guan - May 14, 2023
In recent years, the way people consume media has changed dramatically. Rather than relying on physical media like DVDs or CDs, people now store and access their media through digital means. This shift has led to the rise of media servers, which allow people to store and access their media collections on a single device.
A media server is a device that stores and streams digital media files to other devices on a network. It can be a computer, a dedicated media server, or a network-attached storage (NAS) device. A media server stores digital media files, such as movies, TV shows, music, and photos, and makes them available for streaming to other devices on the same network.
Part 1: What is the Benefits of having a Media Server at Home?
One of the main benefits of having a media server at home is the convenience it provides. Rather than having to store media files on individual devices or physical media, a media server allows you to store all your media files in one central location. This makes it easy to access your media from any device connected to the network, whether it’s a smartphone, tablet, or TV.
Another benefit of a media server is the ability to customize your media library. You can organize your media files by category, create playlists, and even add artwork and metadata to your media files. This makes it easier to find the media you’re looking for and enhances your overall media viewing experience.
The Importance of choosing the Best Media Server
Choosing the best media server is important because it affects the performance and functionality of your media library. Factors to consider when choosing a media server include the amount of storage it provides, its processing power, and the type of media it can support. Other factors to consider include the ease of use, compatibility with your devices, and the availability of support and updates.
Part 2: What You should know about Media Servers?
Media servers are essential tools that enable users to store, organize, and share multimedia content such as photos, videos, and music. These servers can store and stream content to various devices connected to the network, such as smartphones, tablets, laptops, and smart TVs. With a media server, you can access your media files from anywhere, anytime, and on any device, without the need to transfer files between devices.
How Media Servers Work?
Media servers are designed to store, organize and stream multimedia content from a central location. The server software is installed on a computer or a dedicated device that is connected to the network. The media files are then stored on the server’s hard drive or external storage devices.
When a user wants to access the media files, they connect to the media server through a media player application installed on their device. The media player retrieves the multimedia content from the server and streams it to the device, allowing the user to watch or listen to the content.
What are the Types of Media Servers?
There are different types of media servers available in the market, including DIY media servers, pre-built media servers, and cloud-based media servers.
DIY Media Servers
DIY media servers are customized media servers built from scratch. These servers are built using a spare computer or a single-board computer like Raspberry Pi, LattePanda, or ZimaBoard. DIY media servers offer the flexibility of customization, allowing users to choose the software and hardware components that meet their specific needs.
Pre-built Media Servers
Pre-built media servers are ready-to-use servers that come with pre-installed software and hardware components. These servers are designed for users who want a plug-and-play solution without the hassle of building a server from scratch. Pre-built media servers come in different sizes, storage capacities, and processing power, depending on the user’s needs.
Cloud-based Media Servers
Cloud-based media servers are hosted on remote servers and offer users unlimited storage capacity and access to media files from anywhere, anytime. Cloud-based media servers offer the convenience of not having to maintain and manage hardware on-site, but they come with subscription fees and reliance on internet connectivity.
Features of Media Servers
Media servers come with various features that enhance the user experience, such as transcoding, metadata tagging, and remote access. Transcoding is a process that converts media files into different formats suitable for playback on different devices. Metadata tagging is a feature that enables users to organize media files by adding tags, descriptions, and cover art.
Remote access is a feature that allows users to access their media files from anywhere, anytime, and on any device with an internet connection. With remote access, users can share their media files with family and friends, allowing them to stream and enjoy the content from their devices.
With the increasing availability of digital content such as music, movies, and TV shows, it’s becoming more common for households to invest in a media server. A media server allows you to store and access your digital content from a centralized location, making it easier to manage and stream to various devices in your home.
However, choosing the best media server for your needs can be a daunting task. In this article, we’ll discuss the
Part 3: Factors to consider when choosing the best media server for home
Storage Capacity
One of the most critical factors to consider when choosing a media server is storage capacity. The amount of storage you’ll need will depend on how much digital content you have and how much you plan to acquire in the future. It’s best to choose a media server with enough storage to accommodate your needs for the long-term, as adding additional storage later can be a hassle.
Most media servers come with built-in storage, but some allow for additional hard drives to be added for more storage capacity. When considering storage capacity, it’s also important to think about redundancy. A media server with a RAID configuration can protect your data from drive failures and ensure that you don’t lose your content if one drive fails.
Compatibility with Devices
Another essential factor to consider when choosing a media server is device compatibility. Your media server should be able to stream your digital content to all the devices in your home, including TVs, smartphones, tablets, and computers. Therefore, it’s important to choose a media server that is compatible with the devices you already have or plan to purchase in the future.
You should also consider the streaming protocols supported by the media server. Some media servers only support certain protocols, which can limit the devices you can use to access your content. For example, if you plan to stream content to an Apple TV, you’ll want to make sure the media server you choose supports AirPlay.
Ease of Use
The ease of use of the media server is also a critical factor to consider. You don’t want to spend hours setting up and managing your media server, and you want to be able to access your content easily. Therefore, it’s essential to choose a media server with a user-friendly interface that is easy to navigate.
Some media servers come with mobile apps that make it easy to manage and stream content from your phone or tablet. Others have web-based interfaces that can be accessed from any device with a web browser. When considering ease of use, it’s also important to think about the setup process. A media server with a straightforward setup process can save you a lot of time and frustration.
Streaming Quality
The streaming quality of your media server is also an essential factor to consider. You want your content to look and sound great, so it’s important to choose a media server that supports high-quality streaming. Look for media servers that support 4K video streaming, as well as high-resolution audio formats such as FLAC and DSD.
You should also consider the transcoding capabilities of the media server. Transcoding allows the media server to convert video and audio files to a format that is compatible with your devices. A media server with strong transcoding capabilities can ensure that your content streams smoothly and looks and sounds great on all your devices.
Price
Price is always a factor when choosing any technology product, and media servers are no exception. Media servers can range in price from a few hundred dollars to several thousand dollars, depending on the features and storage capacity. It’s essential to choose a media server that fits within your budget while still meeting your needs.
When considering the price of a media server, it’s important to think about the long-term cost as well.
Part 4: Top Media Servers for Home Use
When it comes to media servers for home use, there are a number of options available. In this article, we will be discussing three of the most popular media servers: Plex, Kodi, and Emby. We will go over the features and benefits of each, as well as their pros and cons, to help you decide which one is the best fit for your needs.
- Plex
Plex is perhaps the most well-known media server available, and for good reason. It is user-friendly, versatile, and offers a wide range of features that make it an excellent choice for both beginners and advanced users.
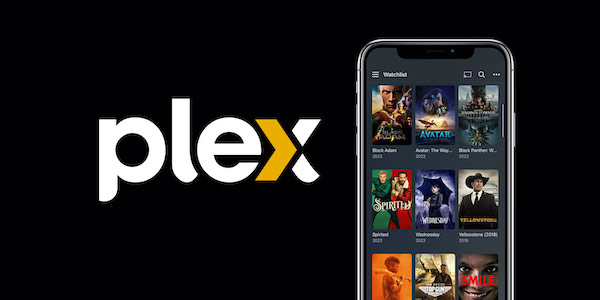
Features and Benefits:
User-friendly interface: Plex has a clean and intuitive interface that makes it easy to navigate and use. You can access your media library from anywhere and stream it to any device.
Wide range of compatible devices: Plex supports a wide range of devices, including smartphones, tablets, smart TVs, gaming consoles, and more.
Automatic metadata and cover art: Plex automatically adds metadata and cover art to your media files, making it easier to browse and find what you’re looking for.
Personalization: You can create user profiles, set parental controls, and customize your media library with playlists and tags.
Live TV and DVR: With Plex, you can watch and record live TV, and even skip commercials with its automatic commercial removal feature.
Mobile syncing: You can sync your media to your mobile device for offline viewing.
Pros:
User-friendly interface: Plex is easy to set up and use, even for beginners.
Wide range of compatible devices: You can stream your media to almost any device.
Automatic metadata and cover art: Plex saves you time by automatically adding metadata and cover art to your media files.
Personalization: You can customize your media library to your liking.
Cons:
Price: Plex offers a free version, but many of its best features are only available with a paid subscription.
Limited DVR options: The DVR feature is only available with a paid subscription, and it has some limitations, such as the inability to record certain channels.
- Kodi
Kodi is an open-source media center that is highly customizable and offers a wide range of features. While it may not be as user-friendly as Plex, it is a popular choice among advanced users who want more control over their media server.
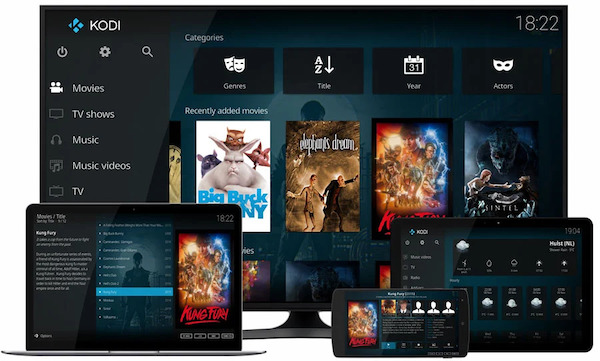
Features and Benefits:
Highly customizable: Kodi is open-source and highly customizable, with a wide range of plugins and add-ons available.
Wide range of compatible devices: Kodi supports a wide range of devices, including smartphones, tablets, smart TVs, gaming consoles, and more.
Live TV and DVR: With Kodi, you can watch and record live TV, and even skip commercials with its automatic commercial removal feature.
Personalization: You can customize your media library with skins, playlists, and tags.
Add-ons and plugins: Kodi has a wide range of add-ons and plugins available that allow you to customize your media server even further.
Pros:
Highly customizable: Kodi offers a wide range of customization options for advanced users.
Wide range of compatible devices: You can stream your media to almost any device.
Add-ons and plugins: Kodi has a wide range of add-ons and plugins available that allow you to customize your media server even further.
Cons:
Not as user-friendly: Kodi can be more difficult to set up and use than other media servers, especially for beginners.
Limited customer support: As an open-source project, Kodi does not offer the same level of customer support as some other media servers.
- Serviio
Serviio is a free and open-source media server that enables you to stream your media files to any device that supports DLNA or UPnP. It allows you to stream audio, video, and image files to smart TVs, gaming consoles, smartphones, and tablets. Serviio also supports transcoding, which means that it can automatically convert media files to formats that are compatible with your devices.
Features and Benefits:
User-friendly interface: Serviio has a simple and easy-to-use interface that makes it easy to organize and stream your media files.
Automatic transcoding: Serviio can automatically transcode media files to formats that are supported by your devices, ensuring that you can access your media files on any device.
Remote access: Serviio allows you to access your media files remotely, enabling you to stream your content from anywhere in the world.
Large online community: Serviio has a large online community that provides support and shares tips on how to get the most out of the media server.
Pros:
Free and open-source.
Supports a wide range of devices.
Automatic transcoding ensures that your media files are compatible with your devices.
Large online community provides support and tips.
Cons:
Limited features in the free version.
Limited support for subtitles.
- Jellyfin
Jellyfin is another free and open-source media server that allows you to stream your media files to any device that supports DLNA or UPnP. It supports a wide range of media formats and allows you to stream content to smart TVs, gaming consoles, smartphones, and tablets. Jellyfin also supports transcoding, ensuring that your media files are compatible with your devices.
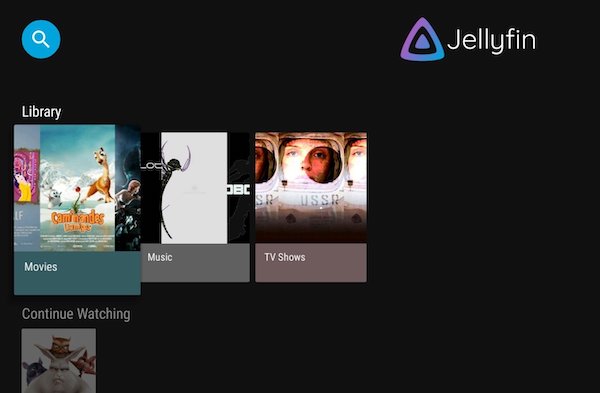
Features and Benefits:
Cross-platform support: Jellyfin is compatible with Windows, Linux, macOS, Android, and iOS, making it accessible to users on multiple platforms.
User-friendly interface: Jellyfin has a modern and intuitive interface that makes it easy to organize and stream your media files.
Live TV and DVR support: Jellyfin allows you to stream live TV and record your favorite shows using its DVR feature.
Large online community: Jellyfin has a large and active online community that provides support and shares tips on how to get the most out of the media server.
Pros:
Free and open-source.
Cross-platform support.
User-friendly interface.
Live TV and DVR support.
Large online community provides support and tips.
Cons:
Limited support for mobile devices.
Limited integration with third-party apps and services.
Part 5: What you should know about ZimaBoard
ZimaBoard is a single-board computer that can function as a media server. It features an Intel Atom processor, 2GB of RAM, and 16GB of eMMC storage. It runs on a custom Linux operating system and comes pre-installed with the Plex media server.
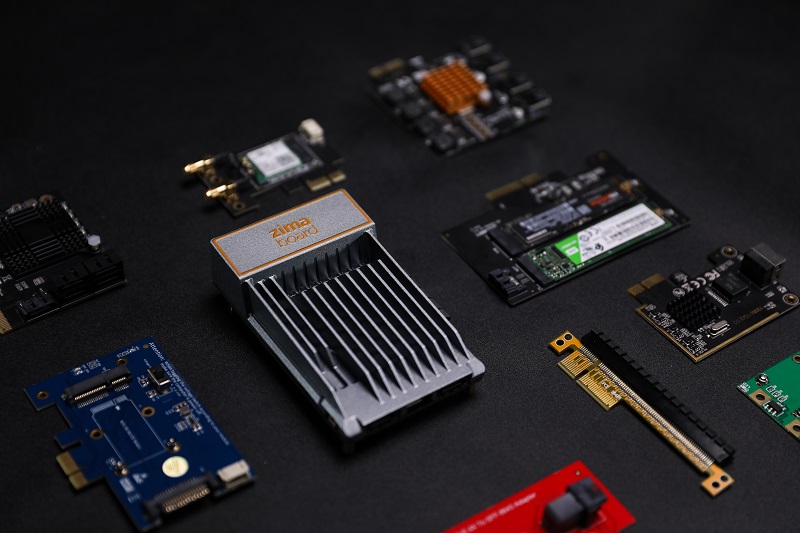
Features and Benefits
ZimaBoard is a single-board server designed to run as a media server or other home automation tasks. It features a powerful Intel processor, up to 8GB of RAM, and up to 32GB of storage capacity, providing users with enough power and storage to run a media server and other tasks simultaneously.
It comes with pre-installed software, including the Plex media server, making it easier for users to set up and start using their media server right away. The ZimaBoard also supports various operating systems, including Ubuntu, Windows, and Android, allowing users to choose the OS that best suits their needs.
Pros
Powerful processor and sufficient storage capacity
Pre-installed Plex media server for easier setup
Supports various operating systems
Compact and easy to install
Cons
Relatively expensive compared to other media servers
Limited support and documentation available
Part 6: How to Setting up a Media Server at Home
A media server is a great way to organize and stream all your digital media content at home. In this section, we will explore the necessary steps to set up a media server at home.
Hardware Requirements:
Before setting up a media server, you need to ensure that your computer or server has the necessary hardware specifications to support the server software and store your media content. Some of the essential hardware requirements include:
A powerful CPU: A powerful CPU is necessary to transcode the media files in real-time and stream them without buffering.
Sufficient RAM: Depending on the number of concurrent streams and the size of the media library, you should have a minimum of 4GB of RAM. However, for larger libraries or more streams, 8GB or more would be more appropriate.
Sufficient storage: You need enough storage capacity to store your media content. It’s recommended to have a minimum of 2TB of storage to accommodate your media library.
A fast and reliable network: You need a fast and reliable network to ensure smooth streaming and prevent buffering. A wired Ethernet connection is preferable over a wireless connection.
Software Requirements:
Once you have ensured that your computer or server meets the hardware requirements, you need to install media server software. There are several free and paid media server software options available, including Plex, Emby, Serviio, and Jellyfin. The software you choose depends on your specific needs and preferences.
Installation Guide:
The installation process for media server software is typically straightforward and similar across different software options. Here’s a general guide to installing media server software:
Download the software: Visit the website of the software you’ve chosen and download the installation file.
Install the software: Double-click on the installation file and follow the prompts to install the software.
Configure the software: Once the software is installed, you need to configure it to work with your media content. This involves pointing the software to the folder where your media content is stored, scanning the folder to add the media to the library, and setting up user accounts and permissions.
Configuration Tips:
Here are some useful tips for configuring your media server:
Organize your media content: To make it easier for the server software to scan and add your media content to the library, organize your content into separate folders by media type (e.g., movies, TV shows, music).
Optimize the media files: To reduce the load on the CPU and improve streaming quality, optimize your media files by converting them to a compatible format and reducing the file size.
Set up remote access: If you want to access your media server from outside your home network, set up remote access using a virtual private network (VPN) or port forwarding.
Enable transcoding: To ensure that your media can be played on all devices, enable transcoding. This converts the media file to a compatible format in real-time as it’s being streamed.
Conclusion:
Setting up a media server at home can be a fun and rewarding project. By following these steps, you can create your own media server and stream your digital content to all your devices. With a media server, you can organize your media library, access your content from anywhere, and enjoy your favorite shows and movies without any interruptions.