Latest News
![]() John Guan - May 19, 2023
John Guan - May 19, 2023
As Midjourney has been widely tried and tested by the public, there are some problems with the AI-generated images that have been identified, from a sense of awe to the fact that the images generated by Midjourney usually tend to be in the same style, which you might call “creamy” and too homogeneous, and that Midjourney does not have If you are a free user, your images will be exposed to the rest of the community, and if you are a paid user, you can’t rule out the possibility that your images will be “stolen” for other purposes.
Stable Diffusion comes from an open-source ecosystem, and with the combination of plug-in capabilities and the creativity of users, more application scenarios can be explored. You will not be satisfied with simply generating a picture by a description like Midjourney, you will treat it as a style designer, and this is when the fun and valuable things will start.
In the community, you will explore a lot of highly stylized models, such as ChilloutMix for Japanese manga style, MoXin for Chinese ink style, and even models that imitate the face of a movie star. You can load these training models to generate images with a higher degree of customization. When it really advances to the stage of commercial availability, I think the focus of the market will shift from Midjourney to Stable Diffusion.
What do you need if you want to Self-hosted a Stable Diffusion environment?
Hardware Preparation
1. A Windows computerPreferably a Windows computer, Mac computers may encounter more difficulties with graphics card drivers. 2. A NV GPU above 6GBIf you want to do training, at least 12GB of video memory.
3. The memory exceeds 16GB8GB of memory is ok, but it is difficult to load the excellent models in the community Construction process, and precautions.
1. Install the Python environment During installation, make sure that Add Python to PATHis checked.
2. Install the git environment
3. In the CMD, run the following command to download the stable-diffusiongit clone https://github.com/AUTOMATIC1111/stable-diffusion-webui.git.
4. Start the stable-diffusion web-uiUse the file manager to find the downloaded webui-user.bat file and run it as a non-administrator.
5. According to the prompt in the previous step, open the IP address, and the user interface will display– If there is any error in the above steps, you can ask GPT to help you solve the problem.
Design a small goal – a few pictures to train a small model
A few important concepts you need to understand
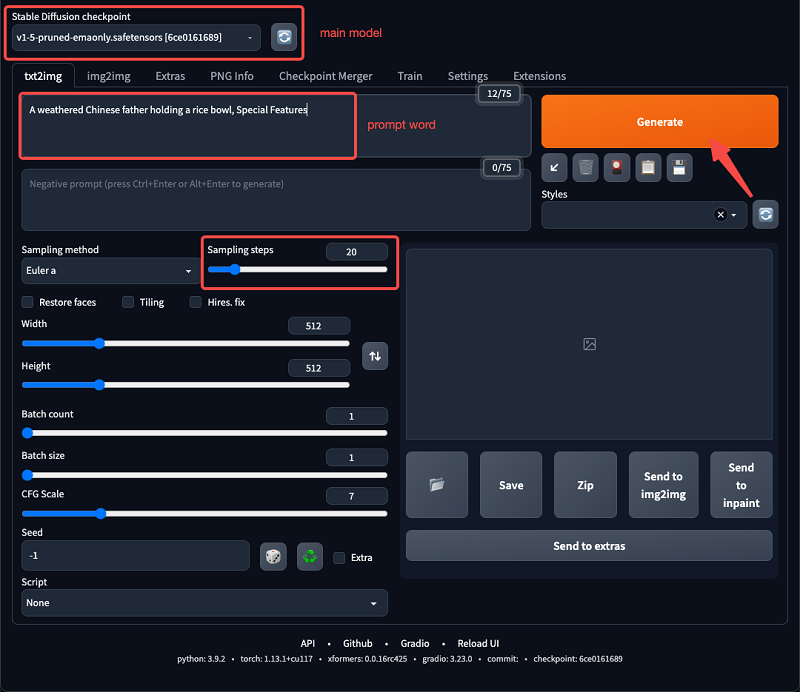
main model
– The main model that affects the output style, you can use the original v1.5 model in the illustration
– You can choose a download you are satisfied with on civiai and put it in the specified location…/stable-diffusion-webui/models/Stable-diffusion
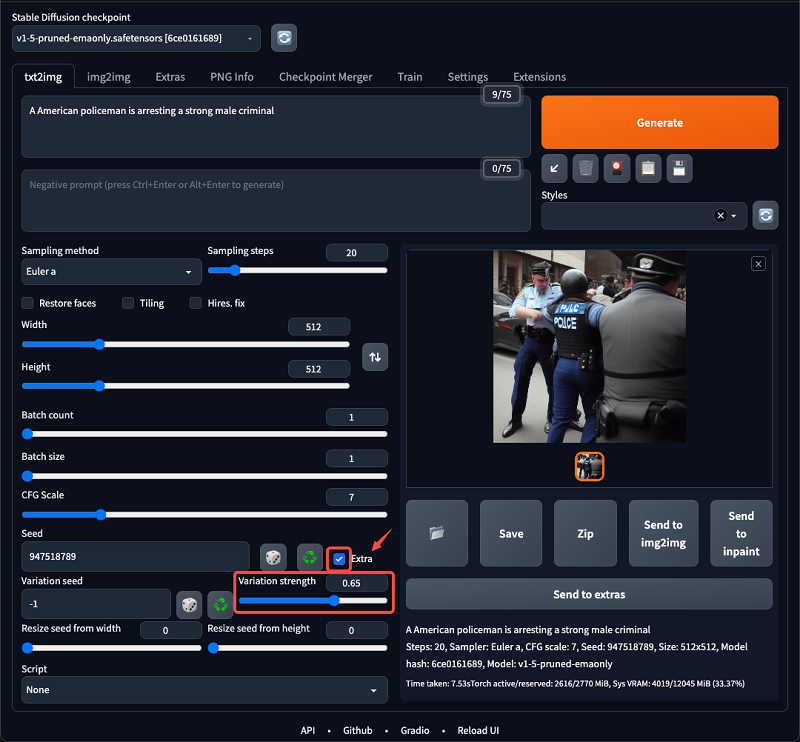
prompt word – Enter the text description of the image you want to generate, for example, A weathered Chinese father holding a rice bowl, Special Features
Sampling steps – Generally speaking, the higher the number of steps, the more refined, but the longer the waiting time. Generally, I will set it between 20-40.
Length and width – 512×512 is a reasonable size, if you have special requirements for the picture ratio, you can also modify it
generates – Click the generate button to execute the generation, if you are not satisfied once, try several times
seeds – If you think the currently generated composition is good, you can continue to use this seed in the next generation by saving the picture below.

advanced options
Extra – Click this checkbox to open the extended options – Difference intensity can increase the detail of the picture, if you think the picture is too single you can increase this value
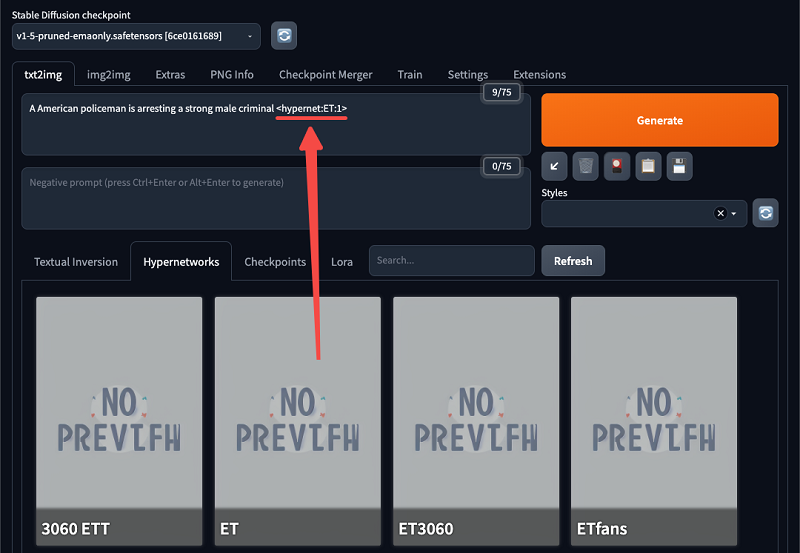
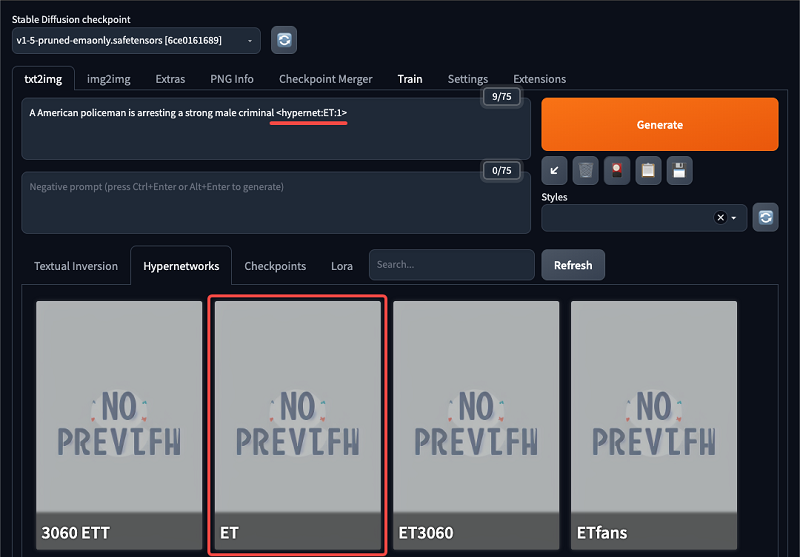
Attach style to the model – Click the red button “show extra Networks” under the Generate button to expand the additional panel – The miniatures can be downloaded from civiai, or you can train them yourself.
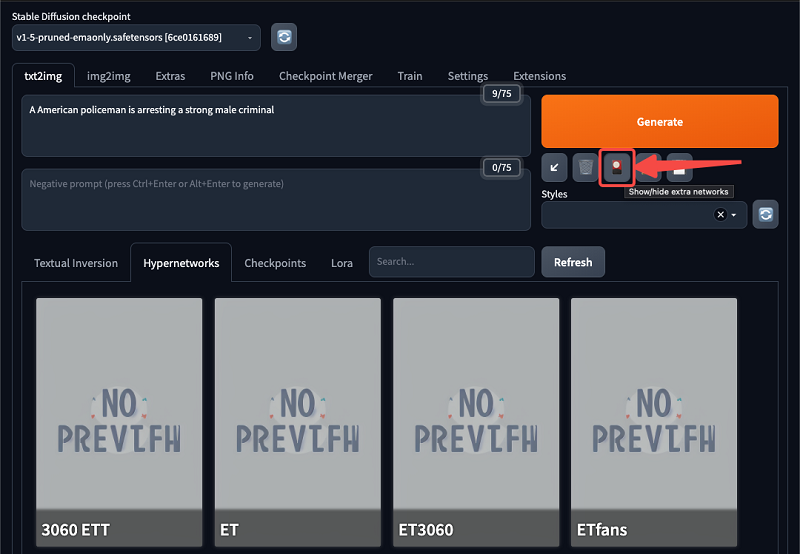
– hyper network is more universal, and LoRA is more suitable for portrait generation
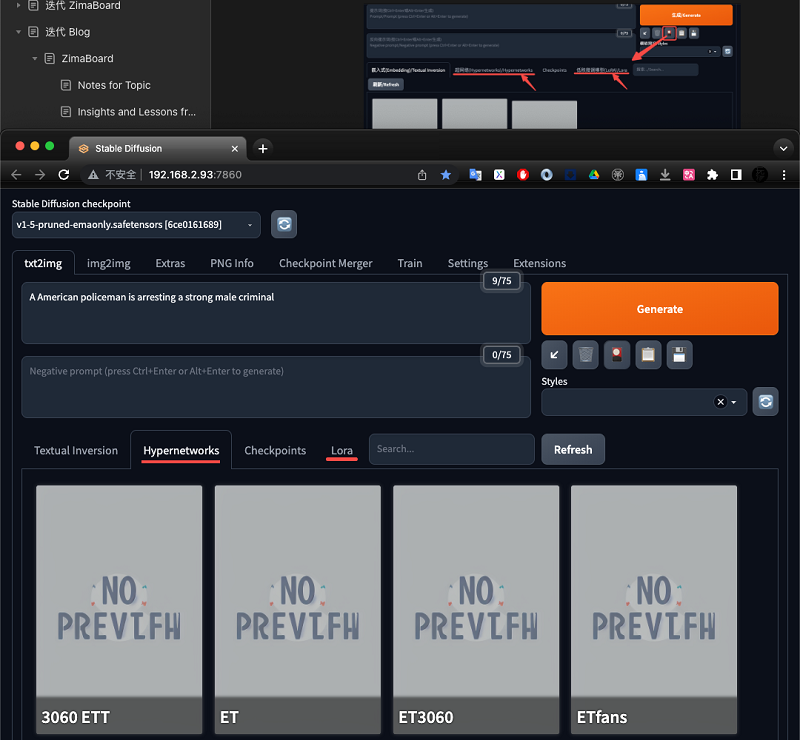
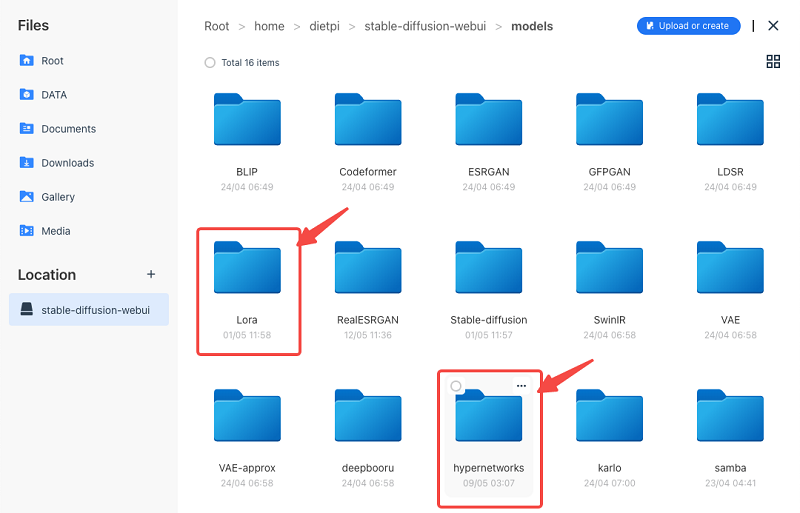
– the mini-models are placed in the corresponding folder under models and can be seen and selected
– after selecting “style”, the parameters of the style will be added to the prompt, and the parameters after it represents the concentration
Actions to achieve the mini-goal (training)
1. prepare the training set
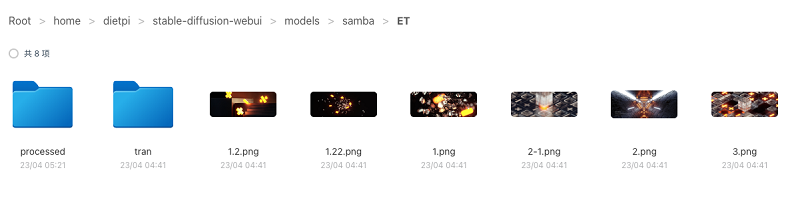
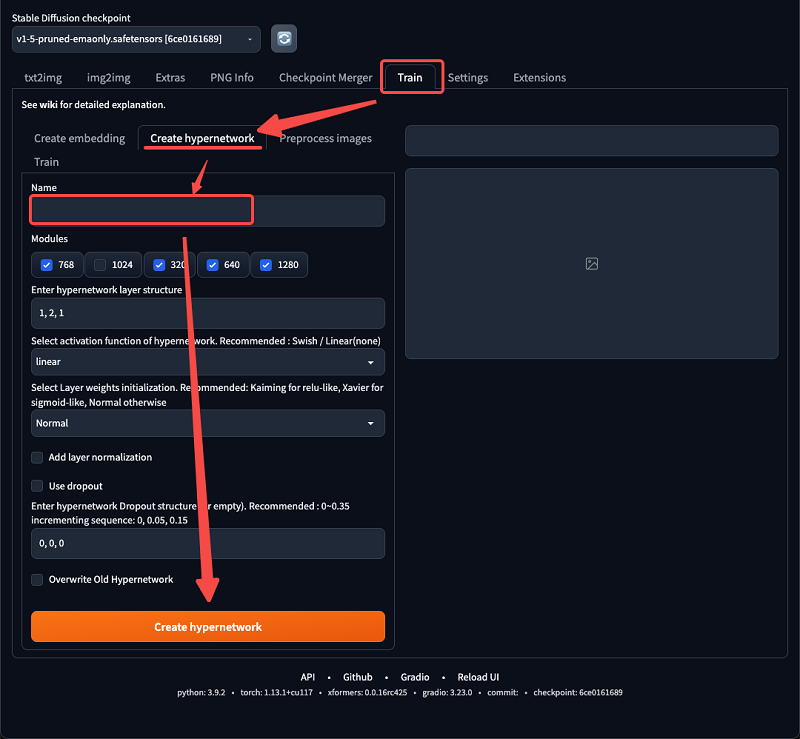
– about 20 images are enough to train a nice little style model – as a start, 5 images with a specific style is fine – the size of the images in the training set needs to be identical 2. Create Hypernetwork – In the training, enter a name to create a hyper network
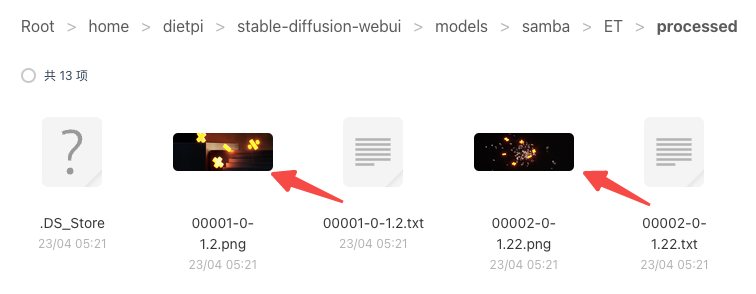
3. Preprocess the images – In this step, the AI will first generate a text description based on the training image. – In the preprocessed image, fill in the folder address of the training image and the folder address of the output preprocessed image. – Modify the aspect size of the training image – If the size is not the same, you can use Birme to modify the image size in batch first. – Check the BLIP option and click the Preprocess button to perform preprocessing
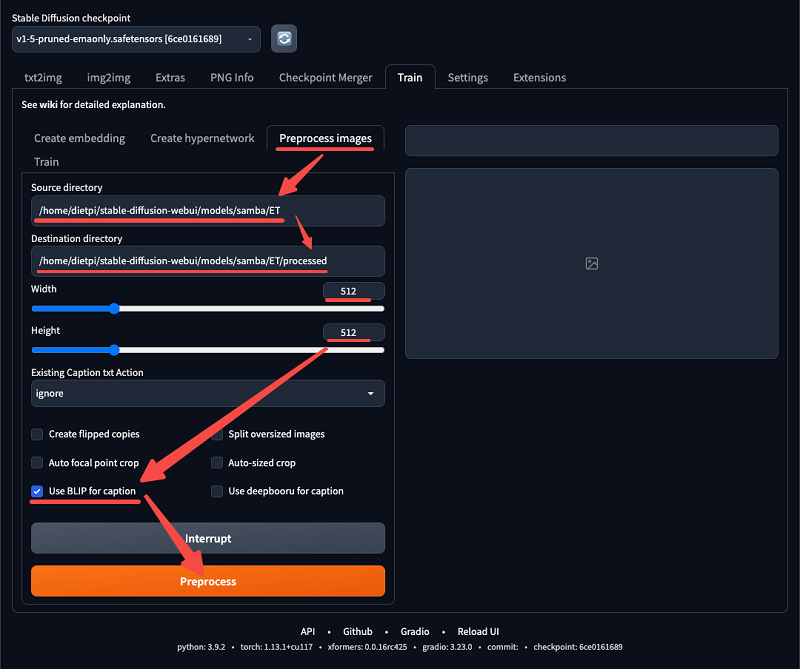
–wait for the completion of each training image next to a txt file, the text is the description of the corresponding image –there will be inaccuracies in the descriptions, you can modify them manually – The accuracy of the descriptions determines the effectiveness of the training to a certain extent

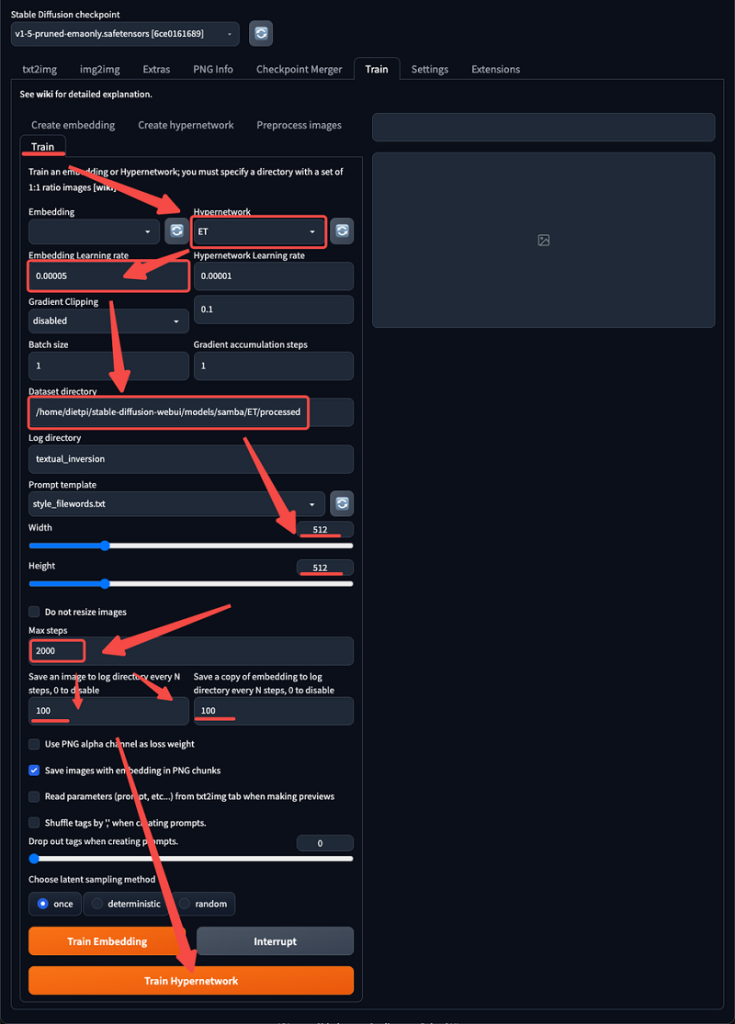
4. Training –In the training, select the Hypernetwork you just created. 2. –input 0.00005 learning rate – In initial training 4 zeros are appropriate, in later training gradually reduce the number of zeros – input the directory with text description and images –modify the image size –choose 2000 iterative steps –Generally speaking, for 2000 steps of training, it takes 1 hour for a 10 series graphics card and half an hour for a 30 series graphics card –Click the Training Hypernetwork button to start training
5. Effect presentation –After the training starts, you can see the training process in the preview window
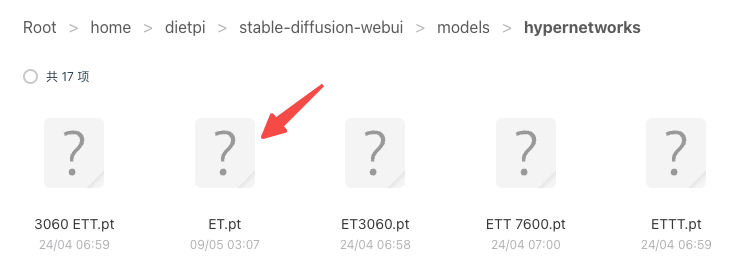
–After the training, you can see the training process in … /stable-diffusion-webui/textual_inversion/date/… You can find the training results In the hyper networks folder –in the images folder are the results of the training process –You can view the images and decide which training result is appropriate
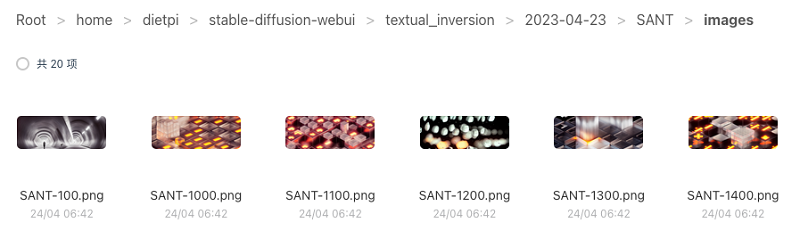
–in the hyper networks folder, the files with the .pt suffix are the training style models – For example, if you think the result of step 1400 is appropriate, you can move the pt file of step 1400 to models/hyper networks as the style
–Using the training results to generate images –In the “txt to img” and “img to img”, select the style you just trained and generate it. –If the style is not strong enough, you can increase the factor
–have fun!
Recently just released the latest developments and my understanding
Recently Stable Diffusion has introduced a new model called DeepFloyd IF, which greatly improves a series of problems with the criticized AI drawing. For example, AI-generated images have problematic spatial relationships, characters with multiple fingers on their limbs, and the inability to carry complex logical relationships. Frankly speaking, I believe that for image AI, the future is on the side of open source and private deployment.
Human society is diverse and different at the visual level, and tools with certain styles and tendencies cannot cover a large area. The difference between human and human aesthetic differences is the different training sets, there is no difference between humans and AI, and private deployment of training to ensure the independence of aesthetics, “independence” can restore a greater degree of “diversity”.